 |
 |
|
 |
|
| Author |
Message |
hirohawa
Community Member

Joined: 18 May 2006
Posts: 1067
|
 Posted: Wed Jun 15, 2011 9:36 pm Post subject: Posted: Wed Jun 15, 2011 9:36 pm Post subject: |
 |
|
| Amazing! |
|
| Back to top |
|
|
|
|
 |
|
 |
|
|
|
|
| Author |
Message |
Staar
Community Member

Joined: 04 Feb 2008
Posts: 757
Location: AUSTRALIA
|
| Posted: Wed Jun 15, 2011 10:27 pm Post subject: |
|
|
It seems that every time I come onto this thread I'm compelled to say the same thing over and over again..
Fantastic beyond words!!
Highest regards
MARK
_________________
 |
|
| Back to top |
|
|
|
|
|
|
|
|
|
|
|
| Author |
Message |
Noeland
Community Guide
Joined: 24 Oct 2006
Posts: 1328
|
| Posted: Thu Jun 16, 2011 1:12 am Post subject: |
|
|
| DaveG wrote: | | I like the idea of having grips that you can easily see through to items and decorations inside. |
My thoughts exactly!  It was an idea I tinkered with on this build: It was an idea I tinkered with on this build:
http://www.propsummit.com/viewtopic.php?t=2705&highlight=assassin
Though the pics don't show it, the dragon is very crisp thought the grip from the right angle.
And look forward to doing again with one of your kits!
_________________
I don't have enough blasters! |
|
| Back to top |
|
|
|
|
|
|
|
|
|
|
|
| Author |
Message |
SCOFFMAN
Community Member

Joined: 23 Mar 2008
Posts: 126
Location: Spokane, WA
|
| Posted: Thu Jun 16, 2011 2:40 am Post subject: |
|
|
Very, very nice DaveG!! You are a master of 3D design... I've seen a lot of great work on a CNC mill, but your grips are far better than most of the other work I've seen. It's very cool you've been able to create molds and cast alternate designs from your originals. How many different sets of grips have you had to mill and then cast for all the different styles of grips you've shared with us? I'm just curious, because I'm just amazed by the amount of various designs you've been able to produce. Bravo man!!
scoff
_________________
Fiery the angles fell, deep thunder rolled around their shores, burning with the fires of Orc. |
|
| Back to top |
|
|
|
|
|
|
|
|
|
|
|
| Author |
Message |
doppelganger01
Community Member

Joined: 05 Nov 2006
Posts: 229
Location: L.V.N.V.
|
|
| Back to top |
|
|
|
|
|
|
|
|
|
|
|
| Author |
Message |
joberg
Community Member
.jpg)
Joined: 06 Oct 2008
Posts: 9447
|
| Posted: Thu Jun 16, 2011 7:13 am Post subject: |
|
|
Boy  it's one great set of grips after another! I don't know if I can take all that coolness at once: must.breathe it's one great set of grips after another! I don't know if I can take all that coolness at once: must.breathe |
|
| Back to top |
|
|
|
|
|
|
|
|
|
|
|
| Author |
Message |
DaveG
Community Member
Joined: 13 Mar 2011
Posts: 373
Location: Southern Calif.
|
| Posted: Thu Jun 16, 2011 10:12 am Post subject: |
|
|
| SCOFFMAN wrote: | | How many different sets of grips have you had to mill and then cast for all the different styles of grips you've shared with us? |
Thanks!
I've only made the one mold you see. All of the different grips are one-offs milled from a plain casting. That's actually turned out to be a great thing since I can engrave grips to order without having to make a mold for each one. Most of them only take a few minutes to cut (once the artwork is done) I'm going to try to do the same thing with clear castings. The only one that's not really practical is the little Ennis tile inlay. A pair of those would take about 4 hours to mill and another hour of bench time fitting the inlay. I just did it, well because I could!
_________________
Dave
"I just want to say people... Get A Life! Move out of your parent's basement! It's just a movie!" |
|
| Back to top |
|
|
|
|
|
|
|
|
|
|
|
| Author |
Message |
Gaff87
Community Member

Joined: 05 Oct 2008
Posts: 1727
Location: United Kingdom
|
| Posted: Thu Jun 16, 2011 10:27 am Post subject: |
|
|
Fantastic work!
Neil |
|
| Back to top |
|
|
|
|
|
|
|
|
|
|
|
| Author |
Message |
andy
Community Guide

Joined: 01 Nov 2006
Posts: 6237
Location: Rochester, NY
|
| Posted: Thu Jun 16, 2011 2:20 pm Post subject: |
|
|
One of the drawbacks to almost all of the replicas before is that the grip patterns always seem soft after being molded off an original master. The hero gun's grips are super sharp looking, and I believe to be the original, and not a mold from it. I think you solved the problem with these, and oh the possibilities.  How about ones with the police logo (eagle) on them? Your work is outstanding, and shows your a professional. Thank you for the almost daily dose of "Wow!". How about ones with the police logo (eagle) on them? Your work is outstanding, and shows your a professional. Thank you for the almost daily dose of "Wow!".
Andy |
|
| Back to top |
|
|
|
|
|
|
|
|
|
|
|
| Author |
Message |
DaveG
Community Member
Joined: 13 Mar 2011
Posts: 373
Location: Southern Calif.
|
| Posted: Fri Jun 17, 2011 12:05 am Post subject: Checkering |
|
|
From what I've seem of the other replica grips it looks like the checkering on the patterns were polished before the molds were made. There's no reason why the molding process would round off or soften the detail if done correctly. I'm still planning to mold the checkered grips and cast them in clear for the stock ones supplied with the kits. They still should be razor sharp.
_________________
Dave
"I just want to say people... Get A Life! Move out of your parent's basement! It's just a movie!" |
|
| Back to top |
|
|
|
|
|
|
|
|
|
|
|
| Author |
Message |
DaveG
Community Member
Joined: 13 Mar 2011
Posts: 373
Location: Southern Calif.
|
| Posted: Fri Jun 17, 2011 5:50 pm Post subject: Black Grips |
|
|
I didn't polish these as I did with the ivory colored resin since I thought the black looks better in a slight satin sheen.

_________________
Dave
"I just want to say people... Get A Life! Move out of your parent's basement! It's just a movie!" |
|
| Back to top |
|
|
|
|
|
|
|
|
|
|
|
| Author |
Message |
DaveG
Community Member
Joined: 13 Mar 2011
Posts: 373
Location: Southern Calif.
|
| Posted: Fri Jun 17, 2011 6:14 pm Post subject: 3D Printed Parts |
|
|
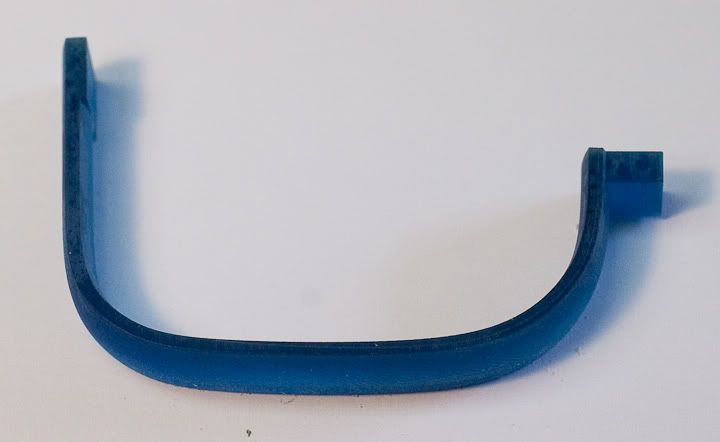
Whenever I get s box of parts from the 3D printer it's like Christmas. I'm still blown away by the technology and what it can achieve! The parts still need some sanding and cleanup but the process saves soooooo much time! The first set of parts arrived today. As I unwrapped each part I get more and more excited.
Here's the trigger guard:
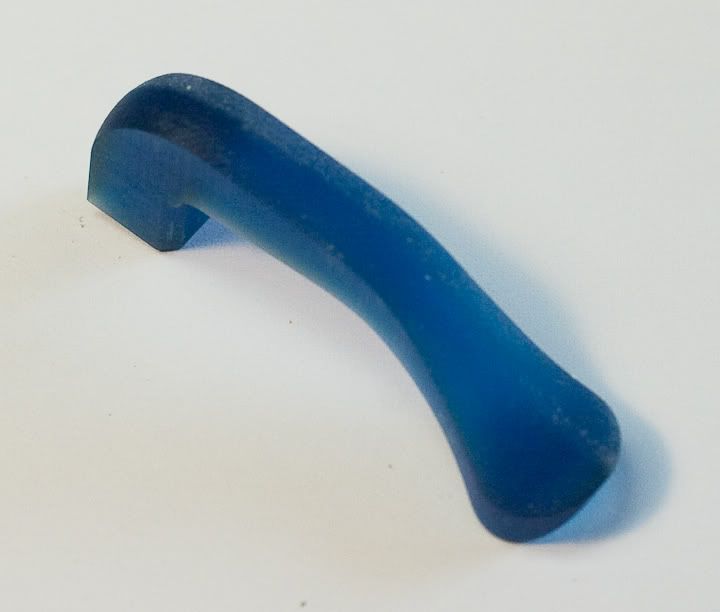
Here's the bolt lever. It's about 84% the size of the real lever.
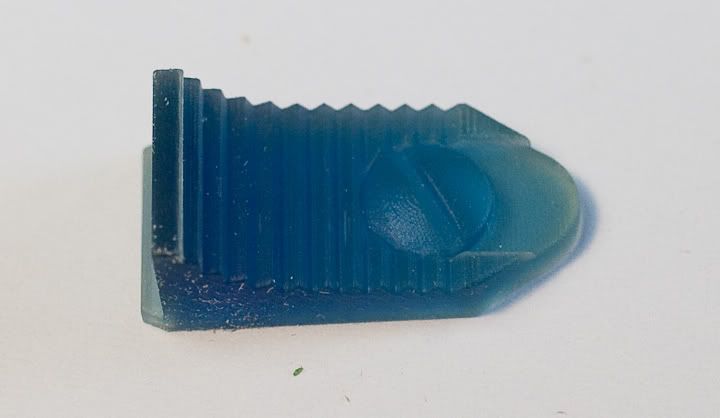
Here are the thumb slides. The Bulldog slide is 1:1 to the real slide (complete with fillester head screw!) The Steyr slide is 84% the size of the real sllde. (When I saw these my brain started melting!)

Here's the Clip Housing:
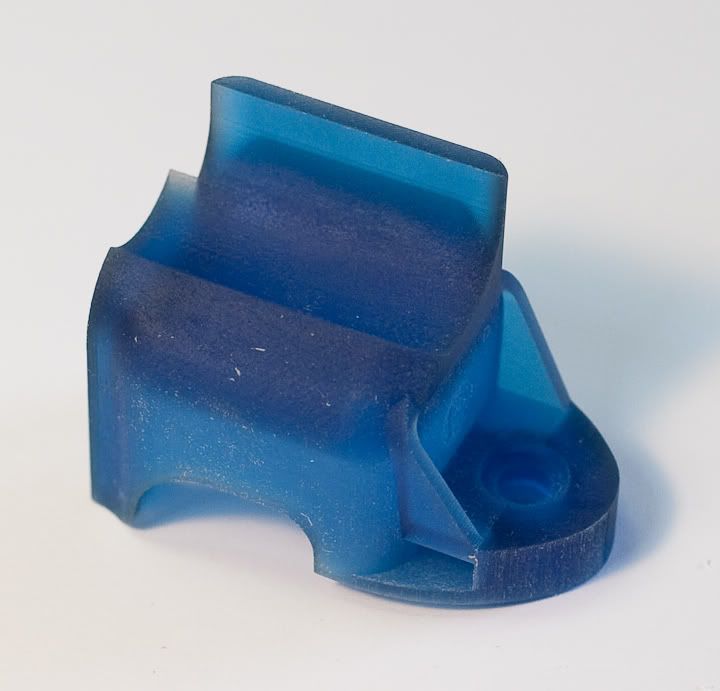
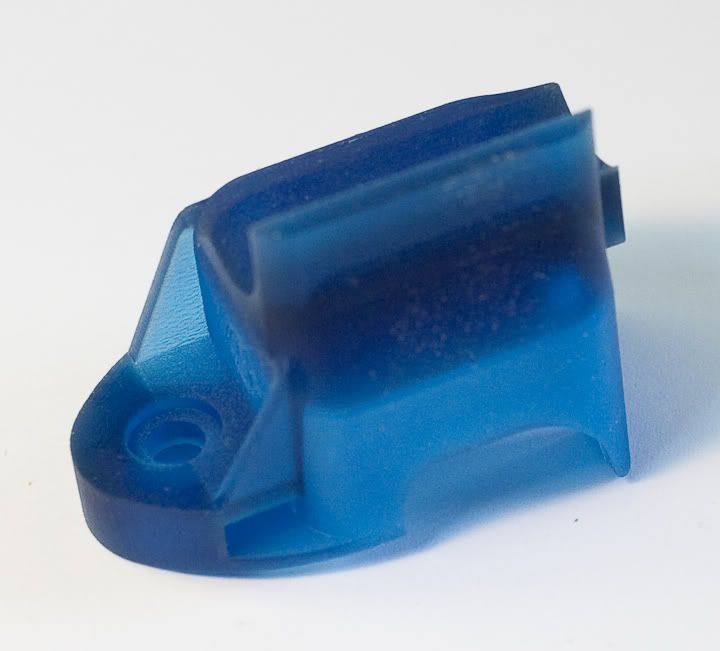
And the removeable clip (it will be held in place with rare earth magnets).
_________________
Dave
"I just want to say people... Get A Life! Move out of your parent's basement! It's just a movie!"
Last edited by DaveG on Fri Jun 17, 2011 6:32 pm; edited 1 time in total |
|
| Back to top |
|
|
|
|
|
|
|
|
|
|
|
| Author |
Message |
Daddy Solo
Community Member

Joined: 03 Jan 2011
Posts: 72
Location: NY
|
| Posted: Fri Jun 17, 2011 6:19 pm Post subject: |
|
|
now my head's gonna explode! Seriously, if you keep posting these update pics, I think my life is in jeopardy due to the overwhelming awesomeness of it all. PLEASE STOP (no wait.... don't)
Last edited by Daddy Solo on Fri Jun 17, 2011 7:37 pm; edited 1 time in total |
|
| Back to top |
|
|
|
|
|
|
|
|
|
|
|
| Author |
Message |
DaveG
Community Member
Joined: 13 Mar 2011
Posts: 373
Location: Southern Calif.
|
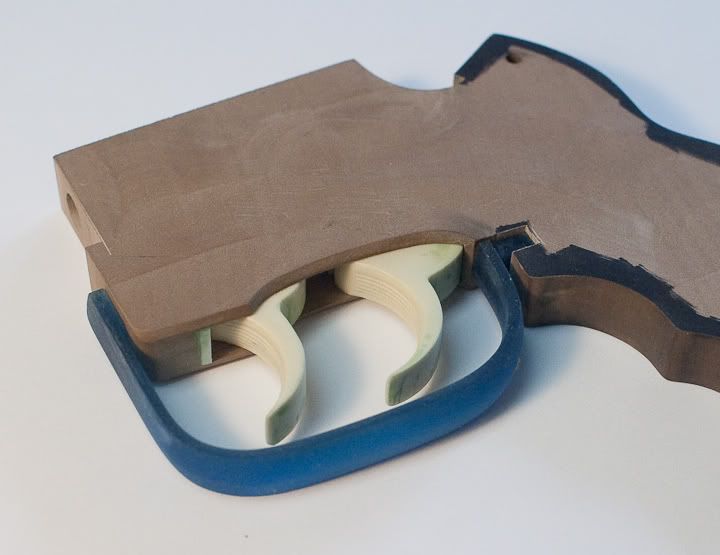
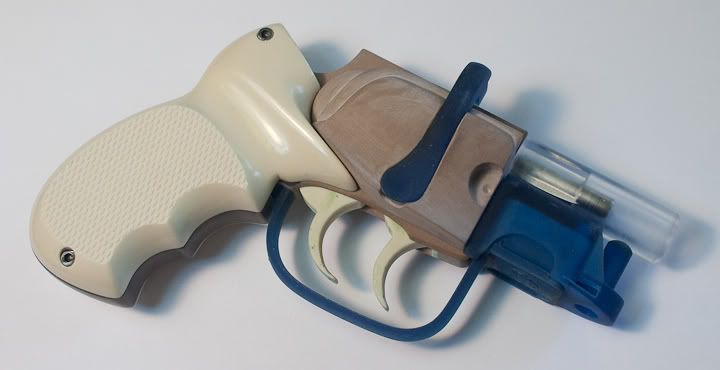
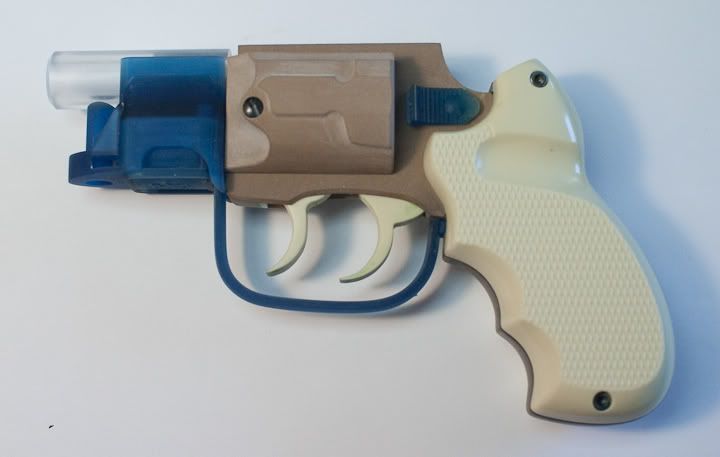
| Posted: Fri Jun 17, 2011 6:48 pm Post subject: Test Fit of Parts |
|
|
Here are some pics of the parts test fit to the frame.
_________________
Dave
"I just want to say people... Get A Life! Move out of your parent's basement! It's just a movie!" |
|
| Back to top |
|
|
|
|
|
|
|
|
|
|
|
| Author |
Message |
panaflex
Community Member
Joined: 02 May 2009
Posts: 194
|
| Posted: Fri Jun 17, 2011 7:24 pm Post subject: |
|
|
Love of beauty is taste. The creation of beauty is art.
- Ralph Waldo Emerson
_________________
Hollywood is the only industry, even taking in soup companies, which does not have laboratories for the purpose of experimentation.
Orson Welles |
|
| Back to top |
|
|
|
|
|
|
|
|
|
|
|
| Author |
Message |
SCOFFMAN
Community Member
Joined: 23 Mar 2008
Posts: 126
Location: Spokane, WA
|
| Posted: Fri Jun 17, 2011 11:08 pm Post subject: |
|
|
| DaveG wrote: | | SCOFFMAN wrote: | | How many different sets of grips have you had to mill and then cast for all the different styles of grips you've shared with us? |
Thanks!
I've only made the one mold you see. All of the different grips are one-offs milled from a plain casting. That's actually turned out to be a great thing since I can engrave grips to order without having to make a mold for each one. Most of them only take a few minutes to cut (once the artwork is done) I'm going to try to do the same thing with clear castings. The only one that's not really practical is the little Ennis tile inlay. A pair of those would take about 4 hours to mill and another hour of bench time fitting the inlay. I just did it, well because I could! |
Ah, that makes sense! A lot less work for sure. I was finally able to convert the Ennis tile SketchUp file I found into AutoCAD so hopefully I'll be able to use it to do some milling myself, but from what I understand surface milling can take LONG time and from the amount of time your little inlays took it looks like I've got my work cut out for me. Once I get it working correctly I have the advantage of just letting it go and checking in on it now and then while I work on other stuff.
As to your 3D printed parts, what material are they being made from? The ABS used in our 3D printer comes out an opaque white.
_________________
Fiery the angles fell, deep thunder rolled around their shores, burning with the fires of Orc. |
|
| Back to top |
|
|
|
|
|
|
|
|
|
|
|
| Author |
Message |
joberg
Community Member
Joined: 06 Oct 2008
Posts: 9447
|
| Posted: Sat Jun 18, 2011 5:09 am Post subject: |
|
|
A thing of beauty for sure Dave, this gun is going to rock big time!  |
|
| Back to top |
|
|
|
|
|
|
|
|
|
|
|
| Author |
Message |
DaveG
Community Member
Joined: 13 Mar 2011
Posts: 373
Location: Southern Calif.
|
| Posted: Sun Jun 19, 2011 12:08 pm Post subject: |
|
|
| SCOFFMAN wrote: | but from what I understand surface milling can take LONG time and from the amount of time your little inlays took it looks like I've got my work cut out for me.
As to your 3D printed parts, what material are they being made from? The ABS used in our 3D printer comes out an opaque white. |
Yes, 3D surface milling on the CNc takes a long time, especially if you want a smooth finish. Basically the bit cuts back and forth, kind of like a 3D version of a print head in an ink jet printer. You set how much overlap for each pass, the smaller the overlap, the better the finish, but also the longer it takes to cut. For the small inlay tile I set a .0015" overlap (that's about half the thickness of a sheet of paper!) and it took about an hour to cut. For the 1/6 scale tiles I've shown elsewhere on the forum I set a .005" overlap (the course nature of the foam I was cutting them from softens the details a bit anyway) and they took abot 3 hours to mill.
The other factor is the setting for cutting speed (how fast the bit travels linearly, not the RPMs) which is measured in inches per minute. This setting really has a lot to do with the rigidity of the CNC machine and how much mass the cutting head has. The higher the IPM is set, the less time it will take to cut out the part, but at some point the mass and inertia of the cutting head will start to round out detail (the software does this as well) so you have to experiment to see what works best for a given part on a given machine.
I'm not sure what kind of polymer the 3D printers are using. They do have machines that use ABS.
_________________
Dave
"I just want to say people... Get A Life! Move out of your parent's basement! It's just a movie!" |
|
| Back to top |
|
|
|
|
|
|
|
|
|
|
|
| Author |
Message |
DaveG
Community Member
Joined: 13 Mar 2011
Posts: 373
Location: Southern Calif.
|
| Posted: Sun Jun 19, 2011 5:19 pm Post subject: |
|
|
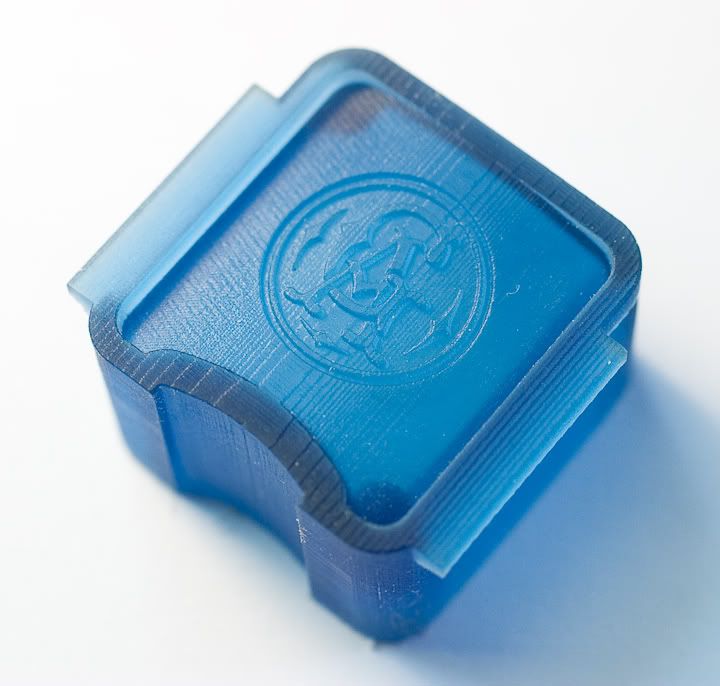
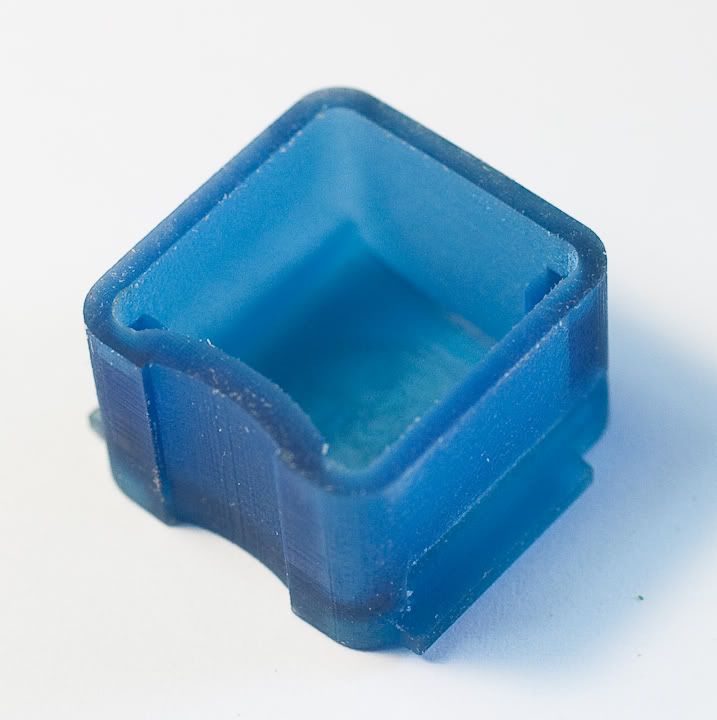
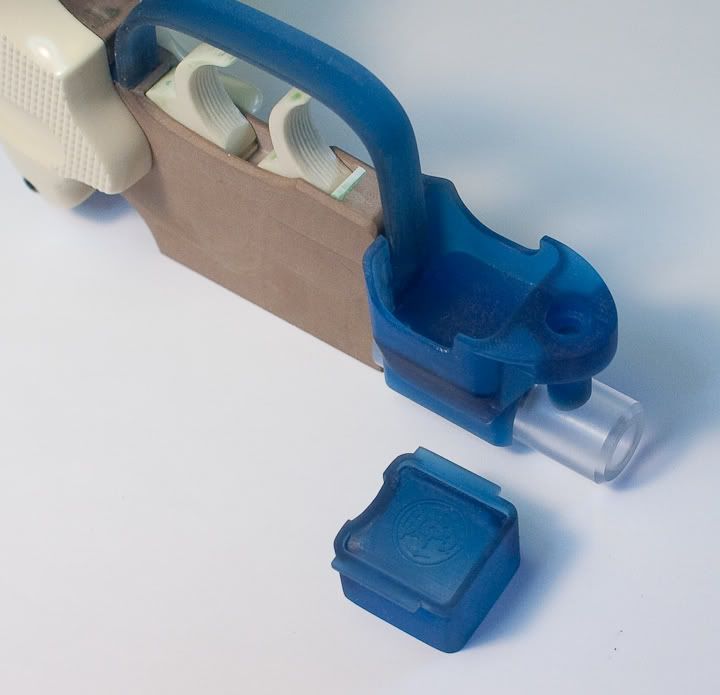
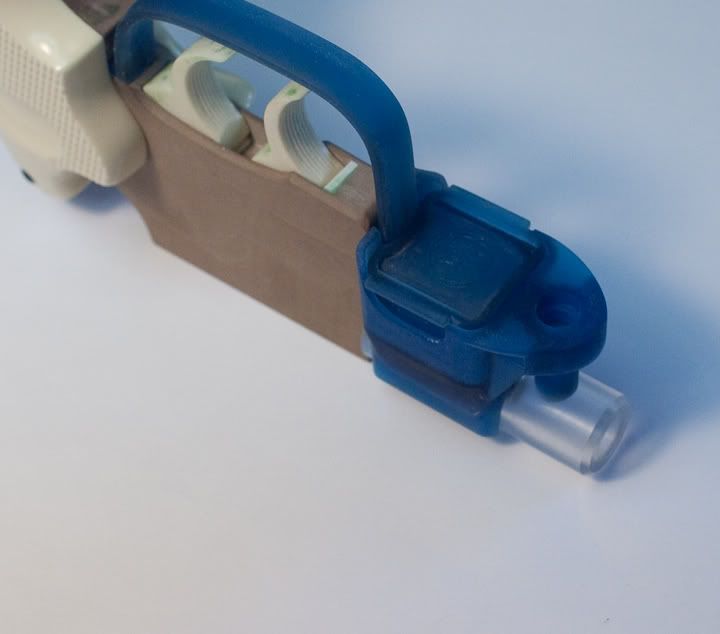
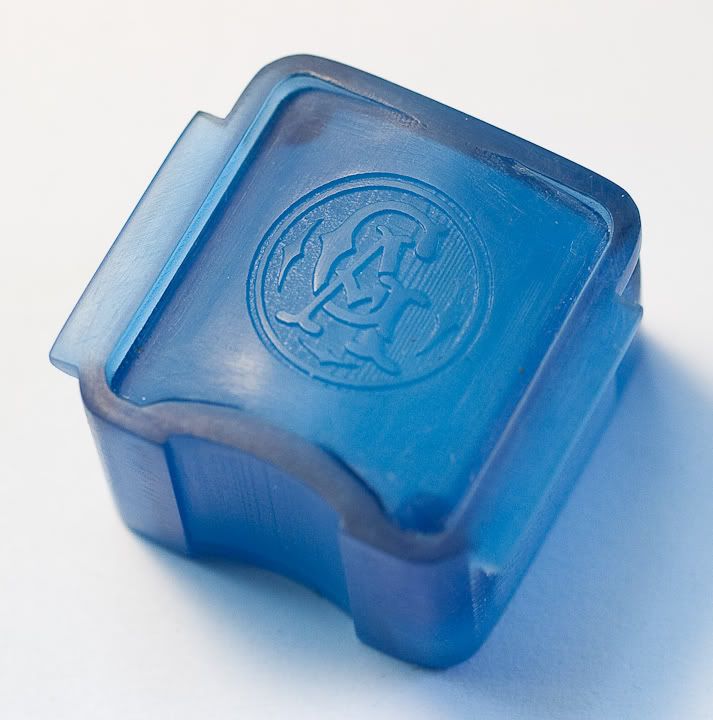
The 3D printed parts are made in .oo3" steps, that's about the thickness of a single sheet of paper. Pretty fine, but the steps do show up, primarily visible on gently curved surfaces. Here's the clip part fist, as it came from the printers, and then after I've cleaned it up with 320, 400 and 600 grit snadpaper.
BEFORE
AFTER
_________________
Dave
"I just want to say people... Get A Life! Move out of your parent's basement! It's just a movie!" |
|
| Back to top |
|
|
|
|
|
|
|
|
|
|
|
| Author |
Message |
joberg
Community Member
Joined: 06 Oct 2008
Posts: 9447
|
| Posted: Mon Jun 20, 2011 7:14 am Post subject: |
|
|
| How much time does it take to sand those pieces? |
|
| Back to top |
|
|
|
|
|
|
|
|
|
|
|
|
You cannot post new topics in this forum
You cannot reply to topics in this forum
You cannot edit your posts in this forum
You cannot delete your posts in this forum
You cannot vote in polls in this forum
|
|
|
|
|
|
|
|


