 |
 |
|
 |
|
| Author |
Message |
joberg
Community Member
.jpg)
Joined: 06 Oct 2008
Posts: 9463
|
 Posted: Tue Jun 25, 2013 6:39 am Post subject: Posted: Tue Jun 25, 2013 6:39 am Post subject: |
 |
|
2 days  dude, you're a machine dude, you're a machine  Really good transfos there and it's true that nothing replaces a real gun in terms of heft, feel and fit. Really good transfos there and it's true that nothing replaces a real gun in terms of heft, feel and fit.
Eager to see how Oz's pieces are going to complete the Steyr part.
Keep up the good work, it's going to look even cooler later on  |
|
| Back to top |
|
|
|
|
 |
|
 |
|
|
|
|
| Author |
Message |
darthwolf7
Community Member
Joined: 26 Dec 2012
Posts: 267
Location: Humboldt County,CA
|
| Posted: Tue Jun 25, 2013 9:23 am Post subject: |
|
|
| Actually... it was about two HOURS....thanks! I'm looking forward to adding the other parts soon. |
|
| Back to top |
|
|
|
|
|
|
|
|
|
|
|
| Author |
Message |
joberg
Community Member
Joined: 06 Oct 2008
Posts: 9463
|
| Posted: Tue Jun 25, 2013 7:26 pm Post subject: |
|
|
2 HOURS You're not a machine, you're a Replicant, yeah, that's it  |
|
| Back to top |
|
|
|
|
|
|
|
|
|
|
|
| Author |
Message |
darthwolf7
Community Member
Joined: 26 Dec 2012
Posts: 267
Location: Humboldt County,CA
|
| Posted: Tue Jun 25, 2013 9:17 pm Post subject: |
|
|
| Ha! Ha! Nah...just inspired and anxious to someday start trying to make a few modified versions of dome Off World models for dome of my lazier Cosplay friends and BR enthusiasts! I really had fun doing this mod and I'm super anxious to do some more just for kicks!!! I'll post dome pics of the grip handle in place as well do you all can see how well it gets also! I'll have to do that later... I'm out to dinner with theMrs.....cheers! |
|
| Back to top |
|
|
|
|
|
|
|
|
|
|
|
| Author |
Message |
darthwolf7
Community Member
Joined: 26 Dec 2012
Posts: 267
Location: Humboldt County,CA
|
| Posted: Tue Jun 25, 2013 10:58 pm Post subject: Grip Frame cut down filed and mounted |
|
|
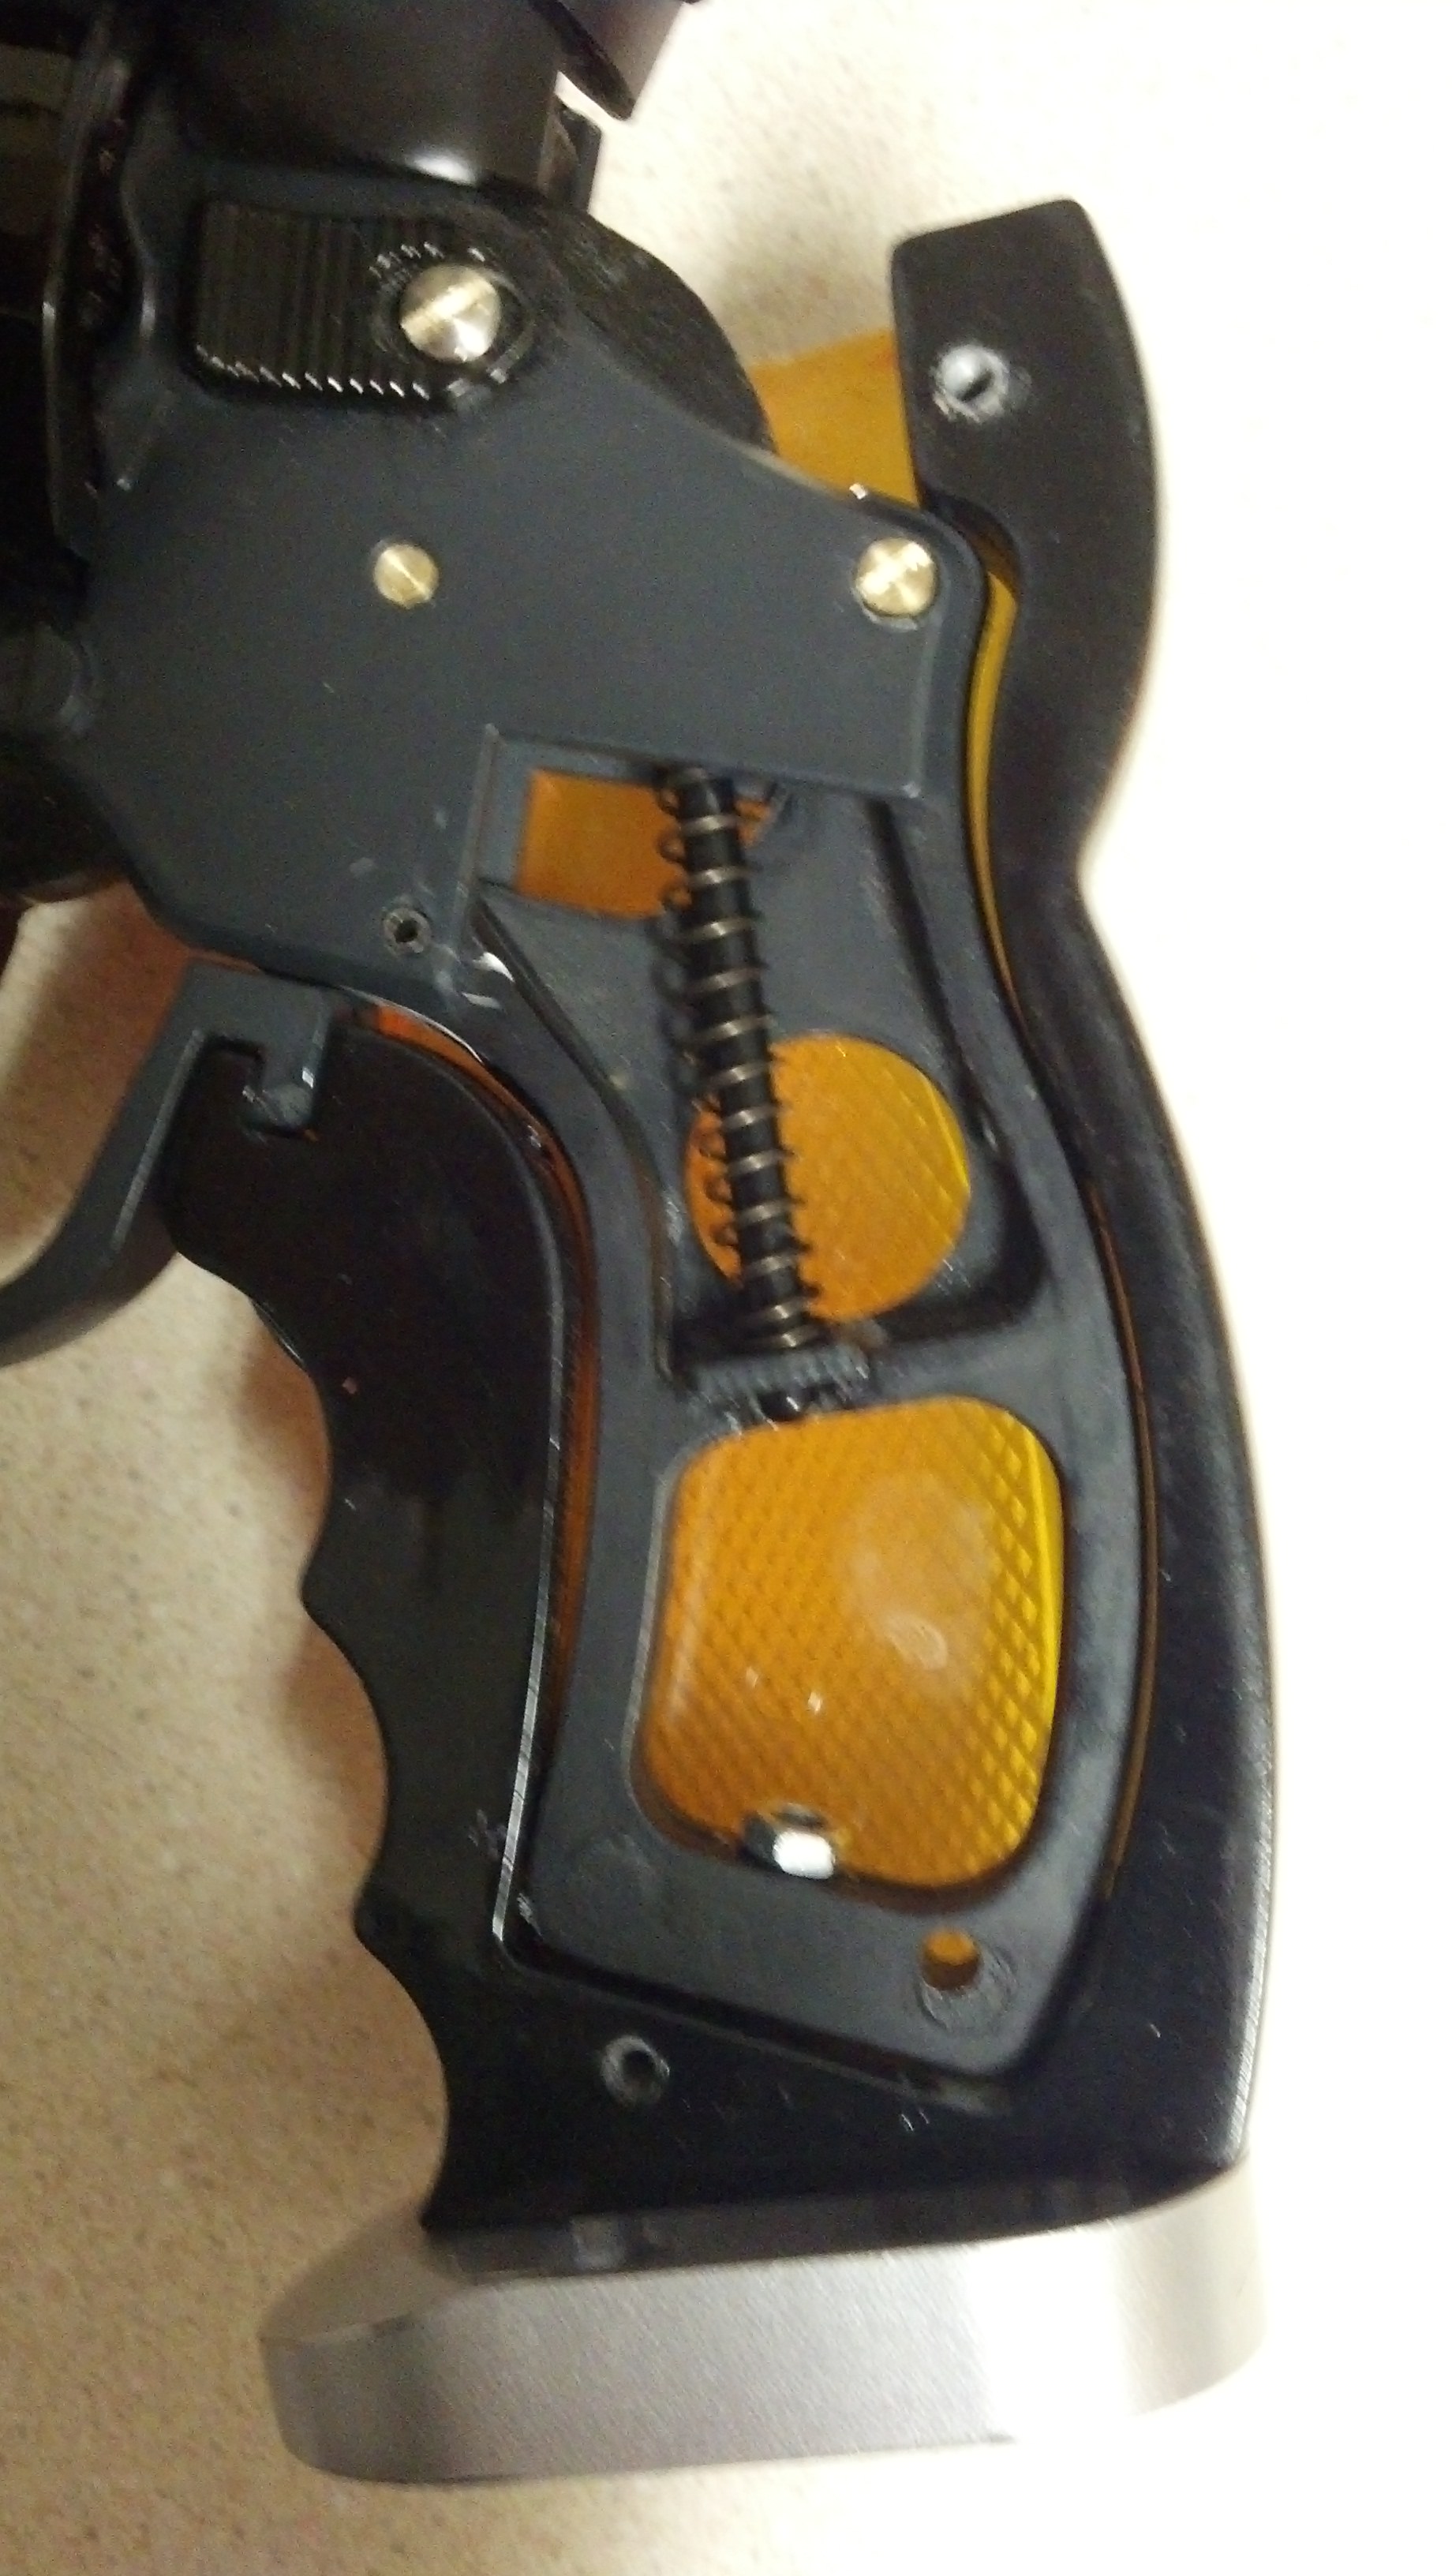
Here are some shots of the REAL aluminium frame installed on my Off World...it took me very little time to cut off the old trigger guard and sand down the rest to fit inside the outer frame...a few drilled holes one in the back and another in the bottom... then I super glued the plastic retaining piece into the grip and inserted the firing mechanism... it was easy and fun...enjoy! Cheers!
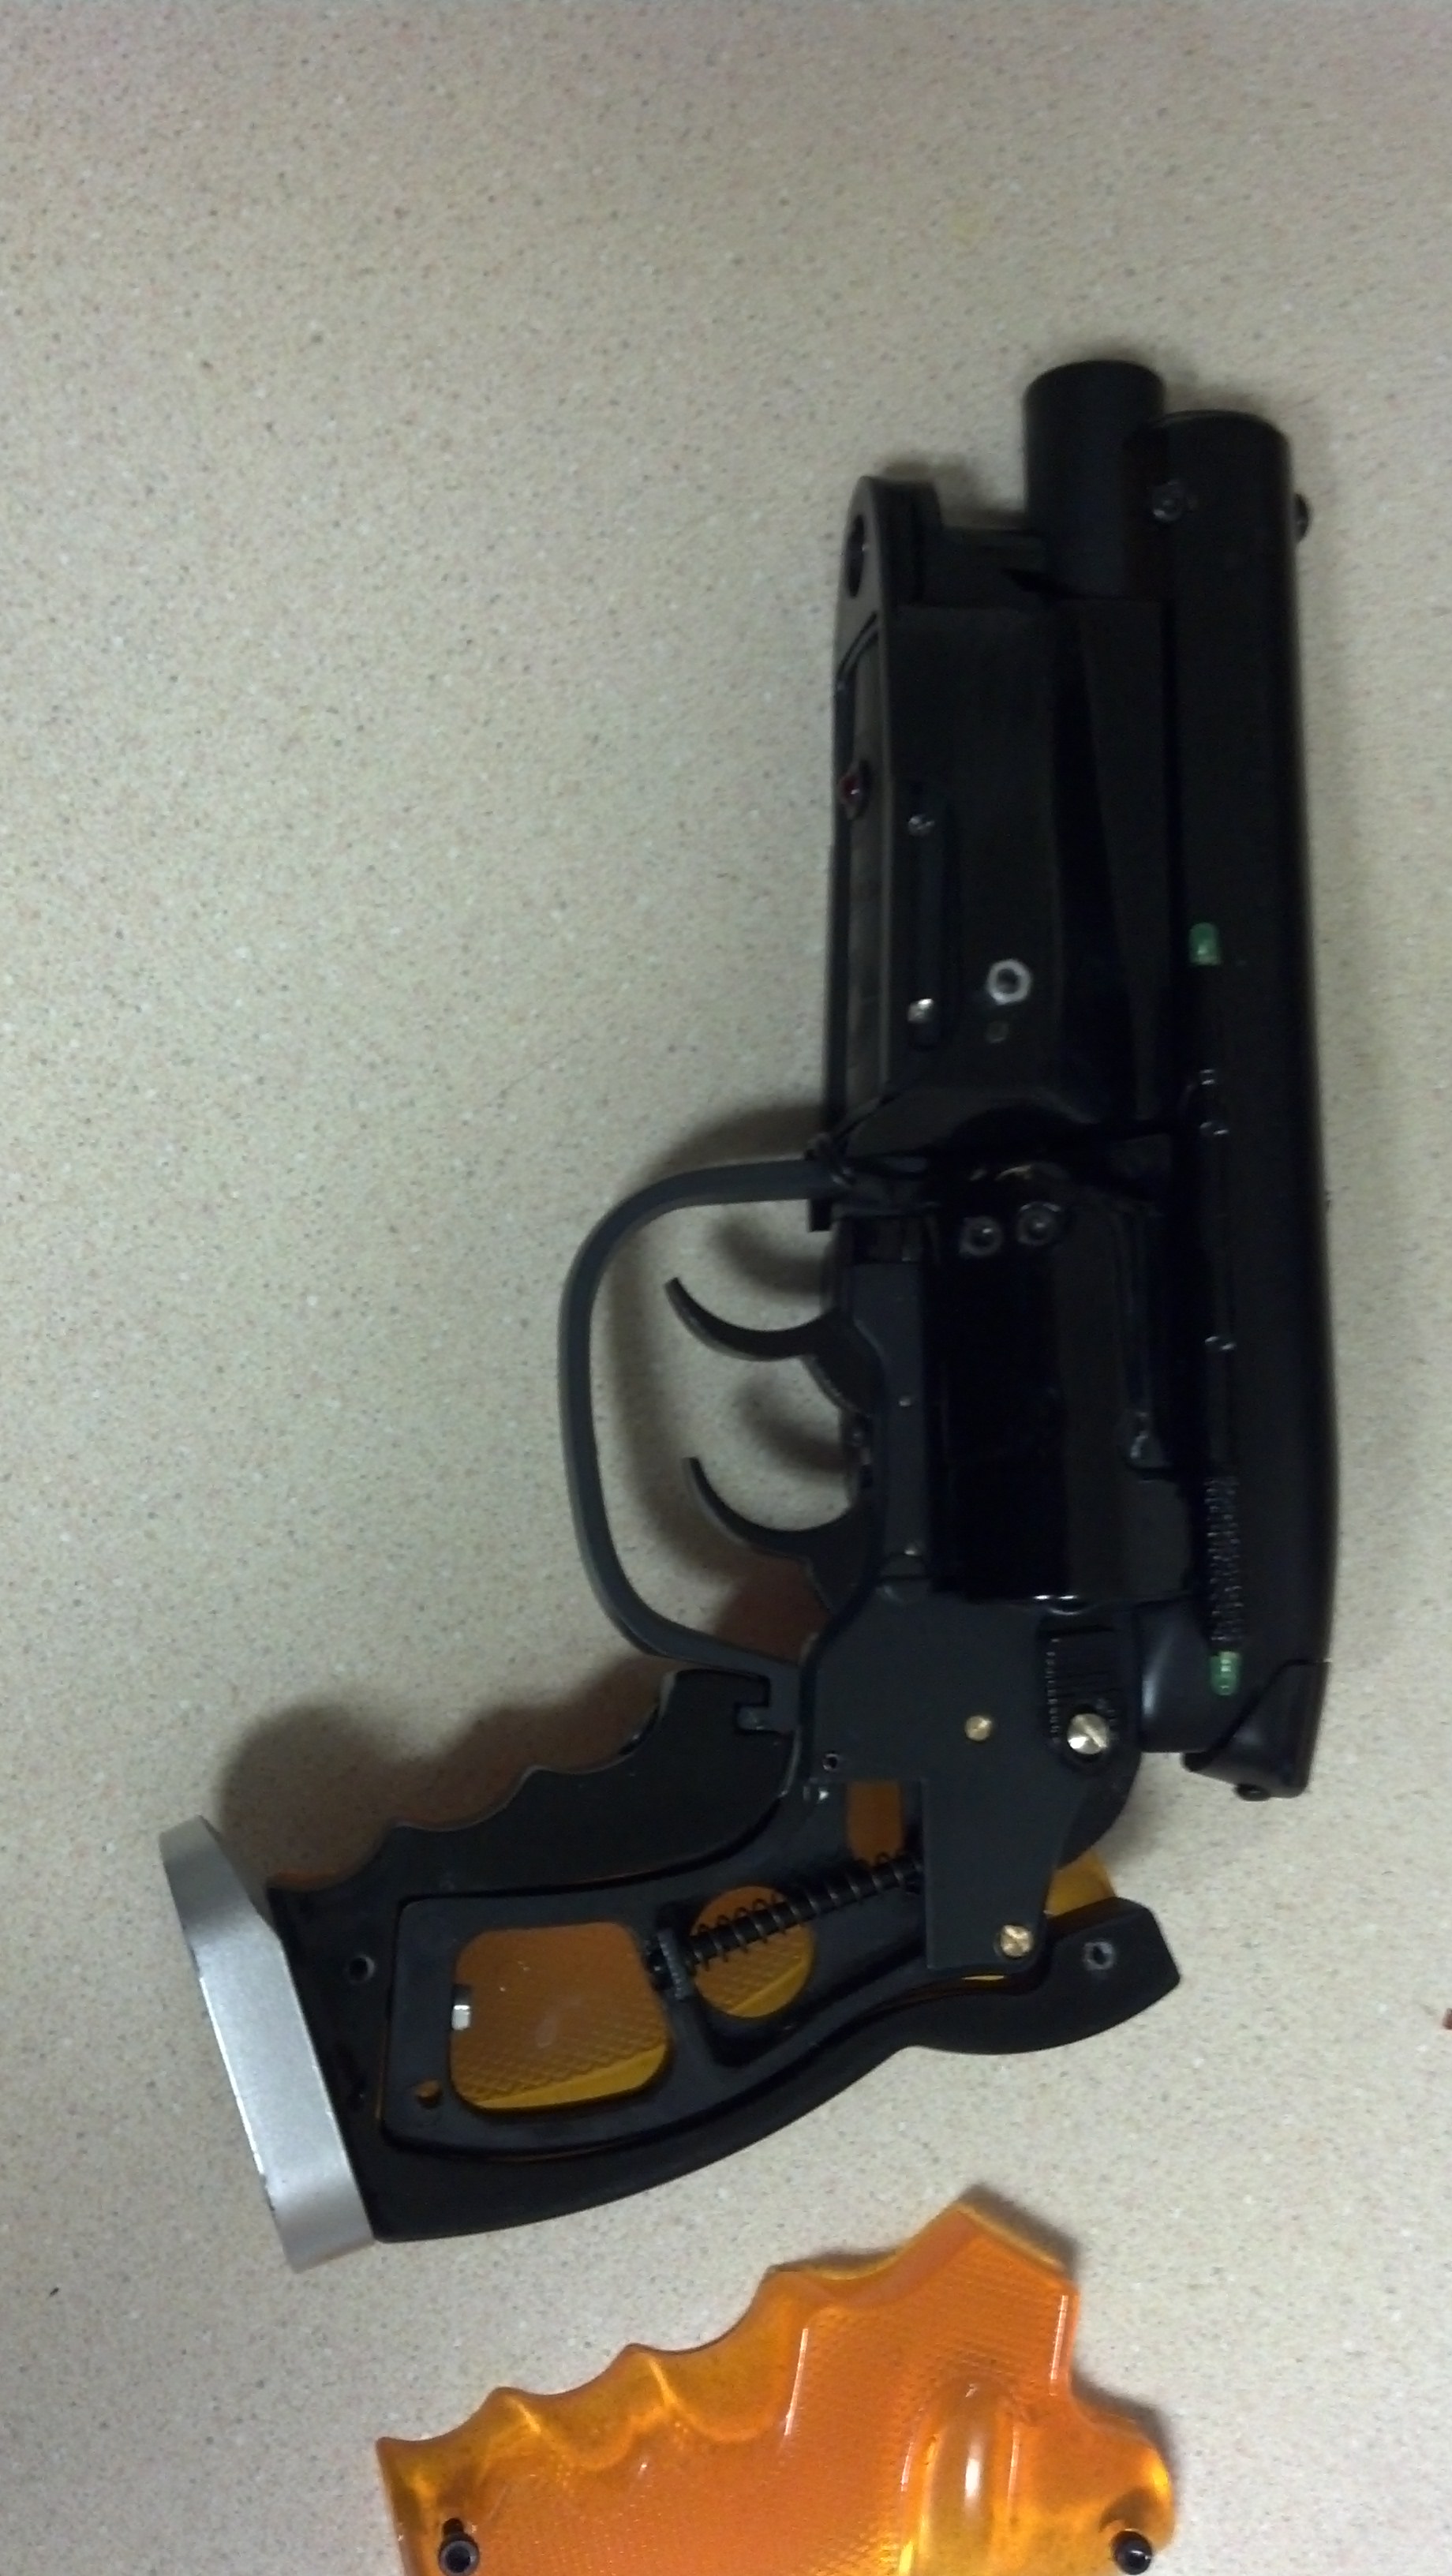
And another....
 |
|
| Back to top |
|
|
|
|
|
|
|
|
|
|
|
| Author |
Message |
darthwolf7
Community Member
Joined: 26 Dec 2012
Posts: 267
Location: Humboldt County,CA
|
| Posted: Tue Jun 25, 2013 10:59 pm Post subject: |
|
|
| Sorry the pictures are so big.... |
|
| Back to top |
|
|
|
|
|
|
|
|
|
|
|
| Author |
Message |
joberg
Community Member
Joined: 06 Oct 2008
Posts: 9463
|
| Posted: Wed Jun 26, 2013 6:43 am Post subject: |
|
|
Great pics darthwolf and yes, that's the size of my eyes after viewing them ...then again, since we're "pics addicts" here, nothing is big enough for us in terms of seeing every single little details on that beauty  |
|
| Back to top |
|
|
|
|
|
|
|
|
|
|
|
| Author |
Message |
darthwolf7
Community Member
Joined: 26 Dec 2012
Posts: 267
Location: Humboldt County,CA
|
| Posted: Wed Jun 26, 2013 9:51 am Post subject: |
|
|
| Well thanks! I'm glad that someone appreciates it...I had a blast with it myself! Next I'm having the Reciever bolt made for me by Oz... |
|
| Back to top |
|
|
|
|
|
|
|
|
|
|
|
| Author |
Message |
darthwolf7
Community Member
Joined: 26 Dec 2012
Posts: 267
Location: Humboldt County,CA
|
| Posted: Sat Jun 29, 2013 9:47 pm Post subject: |
|
|
| I recently noticed thatthe outer grip isn't really seated around the inserted one so I'm going to do some sending etc to make it fit better once I take her apart again... as always, I will post photos when I am finished! Cheers! |
|
| Back to top |
|
|
|
|
|
|
|
|
|
|
|
| Author |
Message |
darthwolf7
Community Member
Joined: 26 Dec 2012
Posts: 267
Location: Humboldt County,CA
|
| Posted: Tue Jul 02, 2013 11:18 am Post subject: Final Stages...first paint and sand |
|
|
Well, I managed to strip and paint my blaster for the first time...it came out pretty good!?? Painting is not my strong spot! But I'm pretty happy with it! ...Once I sand everything down again I will final coat it! Just waiting for parts from Oz and my metal grip frame set...been kinda broke this summer so it'll have to wait a bit more!...still not bad for my first rebuild/repaint...

Hope you all enjoy.. remember, this is just paint job #1...its being repainted again before I'm done! |
|
| Back to top |
|
|
|
|
|
|
|
|
|
|
|
| Author |
Message |
clutch
Community Member

Joined: 12 Dec 2006
Posts: 548
|
| Posted: Tue Jul 02, 2013 1:07 pm Post subject: |
|
|
| Looks great! |
|
| Back to top |
|
|
|
|
|
|
|
|
|
|
|
| Author |
Message |
joberg
Community Member
Joined: 06 Oct 2008
Posts: 9463
|
| Posted: Tue Jul 02, 2013 1:18 pm Post subject: |
|
|
| Pic is small so I don't know what kind of technique you've used...spray paint, brush, airbrushing? |
|
| Back to top |
|
|
|
|
|
|
|
|
|
|
|
| Author |
Message |
darthwolf7
Community Member
Joined: 26 Dec 2012
Posts: 267
Location: Humboldt County,CA
|
| Posted: Tue Jul 02, 2013 1:47 pm Post subject: |
|
|
| I sanded down the parts then primed them with Testors Chrome paint...after that I sanded down the shine of the chrome with 600 grit sandpaper... today, I am sanding abd repainting again one more time to get a nice used chrome finish on the parts...the trigger guard really doesn't matter much to me til I get the aluminum one from Off Works but it'll do for now...the final look was inspired by Richard Coyle's models.... a big thanks to him and everyone who has inspired me to start this little hobby...I'm gonna mod another Off World with real parts soon and resell it when I'm done...that won't be for a bit though...final photos will be larger for everyone! After the paint job...then Oz's reciever and this baby will be done! It's been really fun....thanks everyone! |
|
| Back to top |
|
|
|
|
|
|
|
|
|
|
|
| Author |
Message |
darthwolf7
Community Member
Joined: 26 Dec 2012
Posts: 267
Location: Humboldt County,CA
|
| Posted: Tue Jul 02, 2013 1:53 pm Post subject: |
|
|
| Oh yeah! I also hand carved the weaver knob into a slotted screw using some micro files and a lot of patience! I will get some better shots of the blaster close up so you all can see it! I have a real one coming from a buddy who has some old gun parts but til then this looks OK from a distance and pretty good close up...pics coming soon...goota work right now! Cheers! |
|
| Back to top |
|
|
|
|
|
|
|
|
|
|
|
| Author |
Message |
joberg
Community Member
Joined: 06 Oct 2008
Posts: 9463
|
| Posted: Tue Jul 02, 2013 5:50 pm Post subject: |
|
|
| Most excellent man...but I wouldn't qualify this as a "little hobby" since I'm sure that by now, you'll see your wallet (and time) diminish quite fast with more projects of that kind ...but that's the way we like it! |
|
| Back to top |
|
|
|
|
|
|
|
|
|
|
|
| Author |
Message |
darthwolf7
Community Member
Joined: 26 Dec 2012
Posts: 267
Location: Humboldt County,CA
|
| Posted: Tue Jul 02, 2013 5:58 pm Post subject: |
|
|
| Amazingly, the project wasn't terribly expensive... but it wasn't cheap either!? I figure the Off World was $300.00...the real Bulldog parts were only $40.00 on EBay...LED's very cheap..maybe $10 in all...now for the more expensive parts...upgraded frame kit $130...plus Oz's received bolt when I can afford it $100...still comes out cheaper than a Tomenusuke or a Coyle...both of which I desperately wantfor my collection but alas can never see to attain!?? Hopefully someday... til then this baby should hold me...great Cosplay gun it weighs in at almost 4.5 lbs now!!! Pretty happy overall and ready to do Another one already!!! I guess I've got a ton of hours into her as well but that's OK...I do it for the love of the weapon...not the money obviously!!! Cheers.... more final photos to come!!!! |
|
| Back to top |
|
|
|
|
|
|
|
|
|
|
|
| Author |
Message |
darthwolf7
Community Member
Joined: 26 Dec 2012
Posts: 267
Location: Humboldt County,CA
|
| Posted: Tue Jul 02, 2013 6:02 pm Post subject: |
|
|
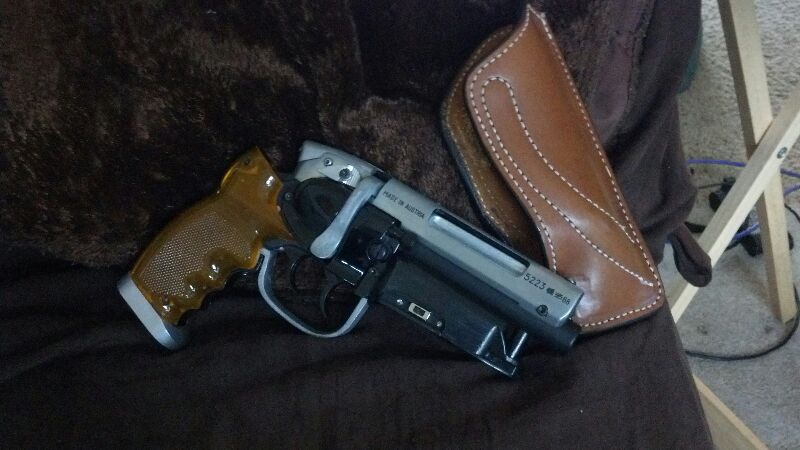
Here's a better shot for you all... |
|
| Back to top |
|
|
|
|
|
|
|
|
|
|
|
| Author |
Message |
darthwolf7
Community Member
Joined: 26 Dec 2012
Posts: 267
Location: Humboldt County,CA
|
| Posted: Tue Jul 02, 2013 6:03 pm Post subject: |
|
|
| I guess not much better huh? Hmm.... |
|
| Back to top |
|
|
|
|
|
|
|
|
|
|
|
| Author |
Message |
joberg
Community Member
Joined: 06 Oct 2008
Posts: 9463
|
| Posted: Wed Jul 03, 2013 6:30 am Post subject: |
|
|
Not bad at all in terms of price when everything is said and done (pic is much better, tx  ). Yes, for sure a Coyle is my dream gun for sure. ). Yes, for sure a Coyle is my dream gun for sure.
Looking forward to your other future projects. |
|
| Back to top |
|
|
|
|
|
|
|
|
|
|
|
| Author |
Message |
darthwolf7
Community Member
Joined: 26 Dec 2012
Posts: 267
Location: Humboldt County,CA
|
| Posted: Wed Jul 03, 2013 11:27 am Post subject: |
|
|
Thanks...for now I'm focused on finishing this baby up. Then its on to trying to build one from scratch using as many real parts as possible! That dude from Spain is very inspiring and I can see now how to cut out some of the parts for the grips etc....going to be expensive imsure but well worth it!
Once I get the FINAL paint job on the plastic bolt (which I'm replacing anyway so Idont know why I'm bothering?) It will look and feel a lot better! Til the final pics are posted....cheers! |
|
| Back to top |
|
|
|
|
|
|
|
|
|
|
|
|
You cannot post new topics in this forum
You cannot reply to topics in this forum
You cannot edit your posts in this forum
You cannot delete your posts in this forum
You cannot vote in polls in this forum
|
|
|
|
|
|
|
|


