 |
 |
|
 |
|
| Author |
Message |
QuartZ
Community Member
Joined: 21 May 2007
Posts: 25
|
 Posted: Sun Jul 31, 2016 9:36 pm Post subject: My Completed Blaster (Modified 2006 Sidkit) Posted: Sun Jul 31, 2016 9:36 pm Post subject: My Completed Blaster (Modified 2006 Sidkit) |
 |
|
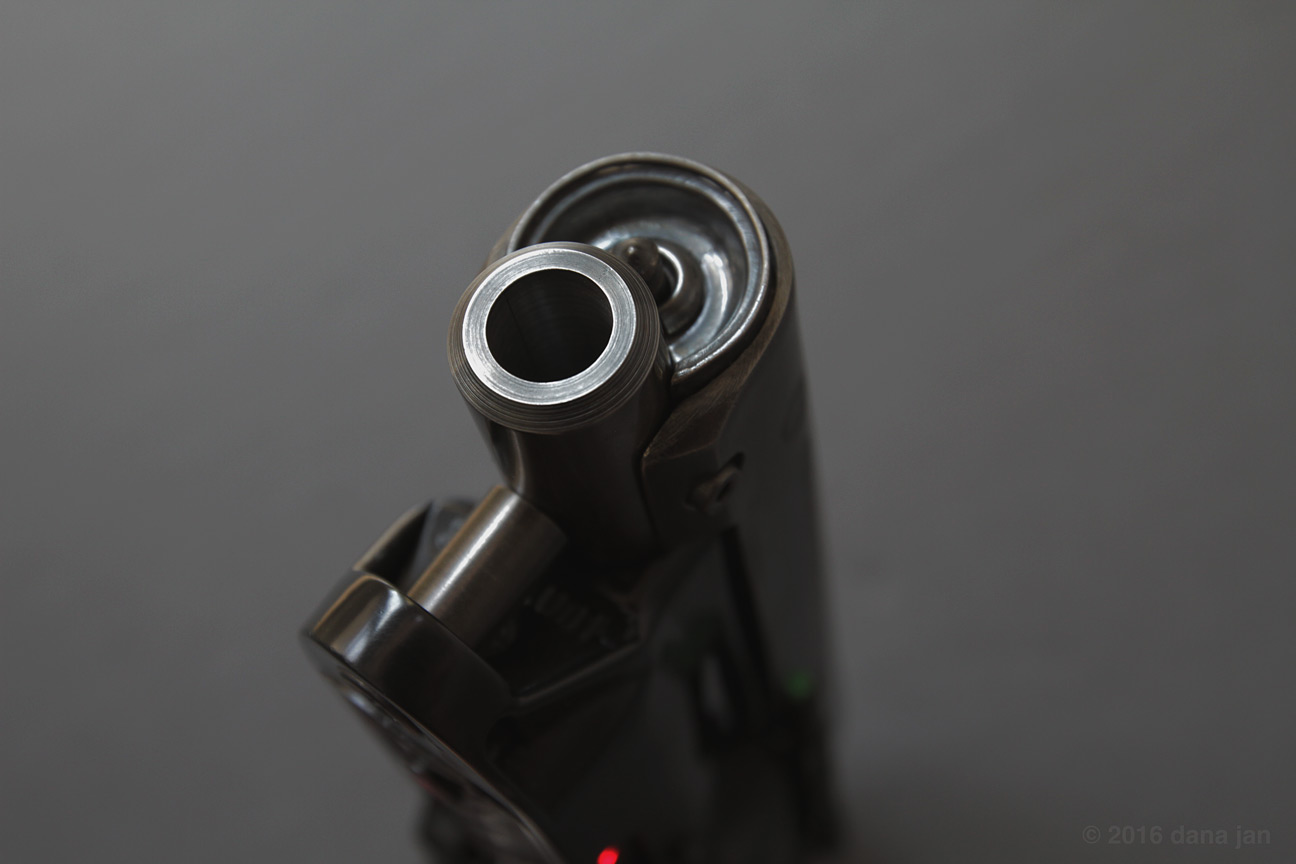
Enjoy the photos below. I'll give a bit of information about the build after the photos:
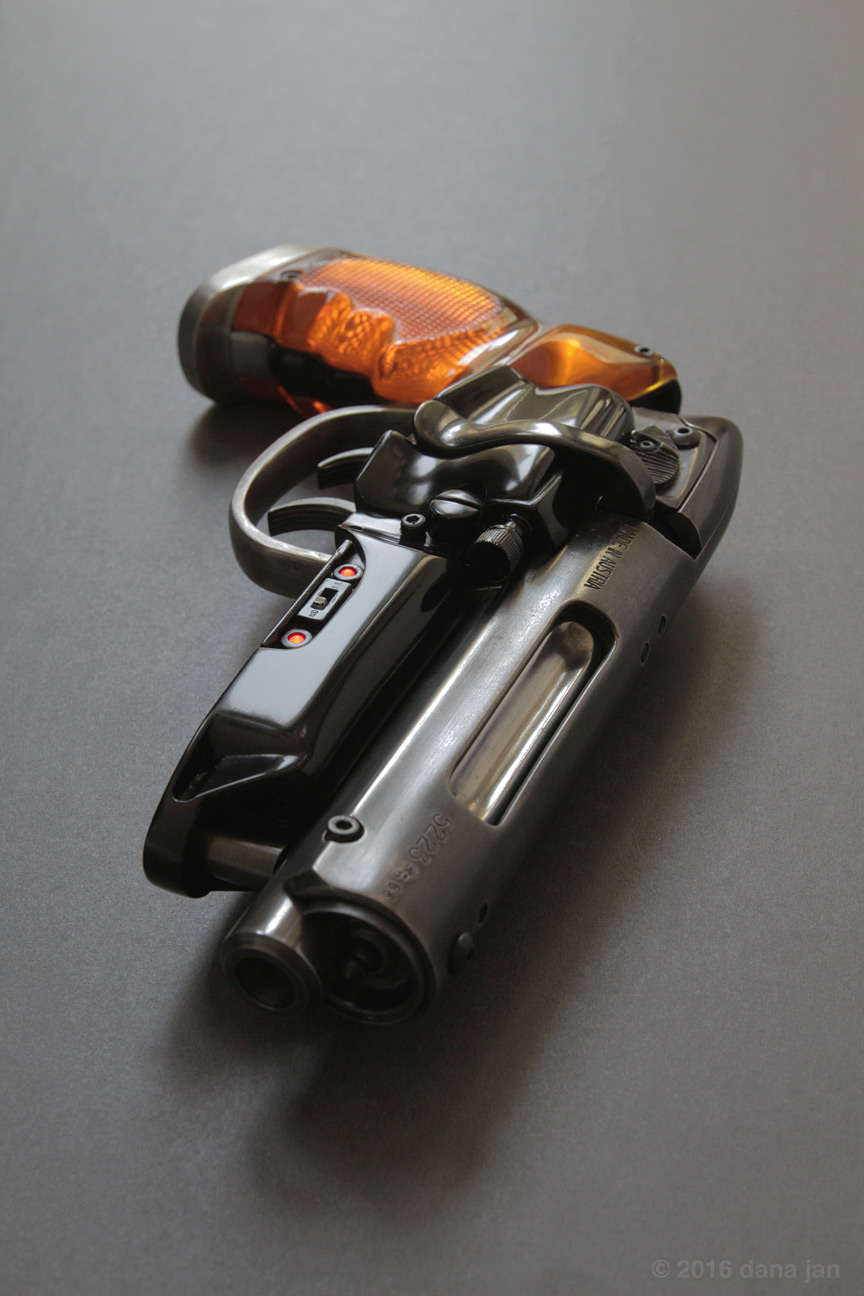
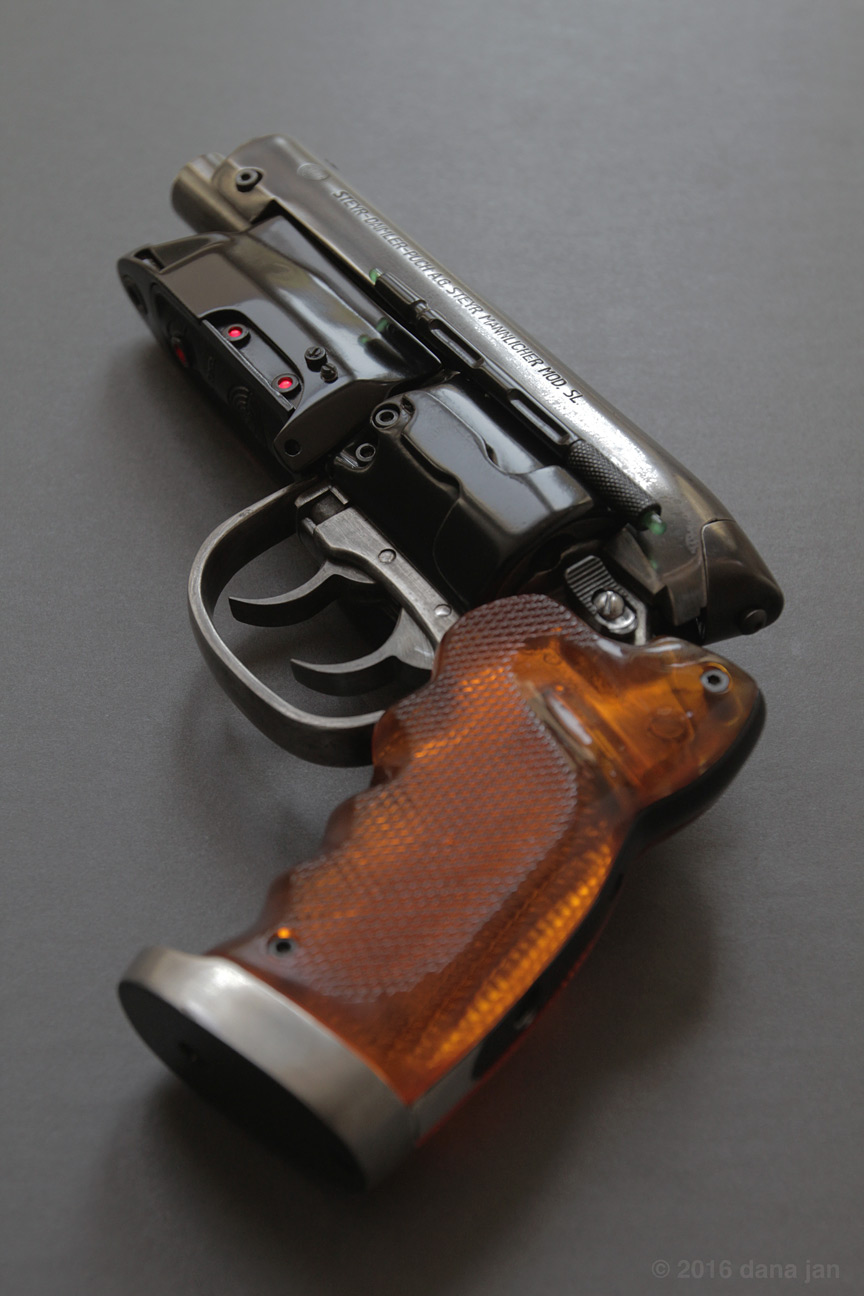
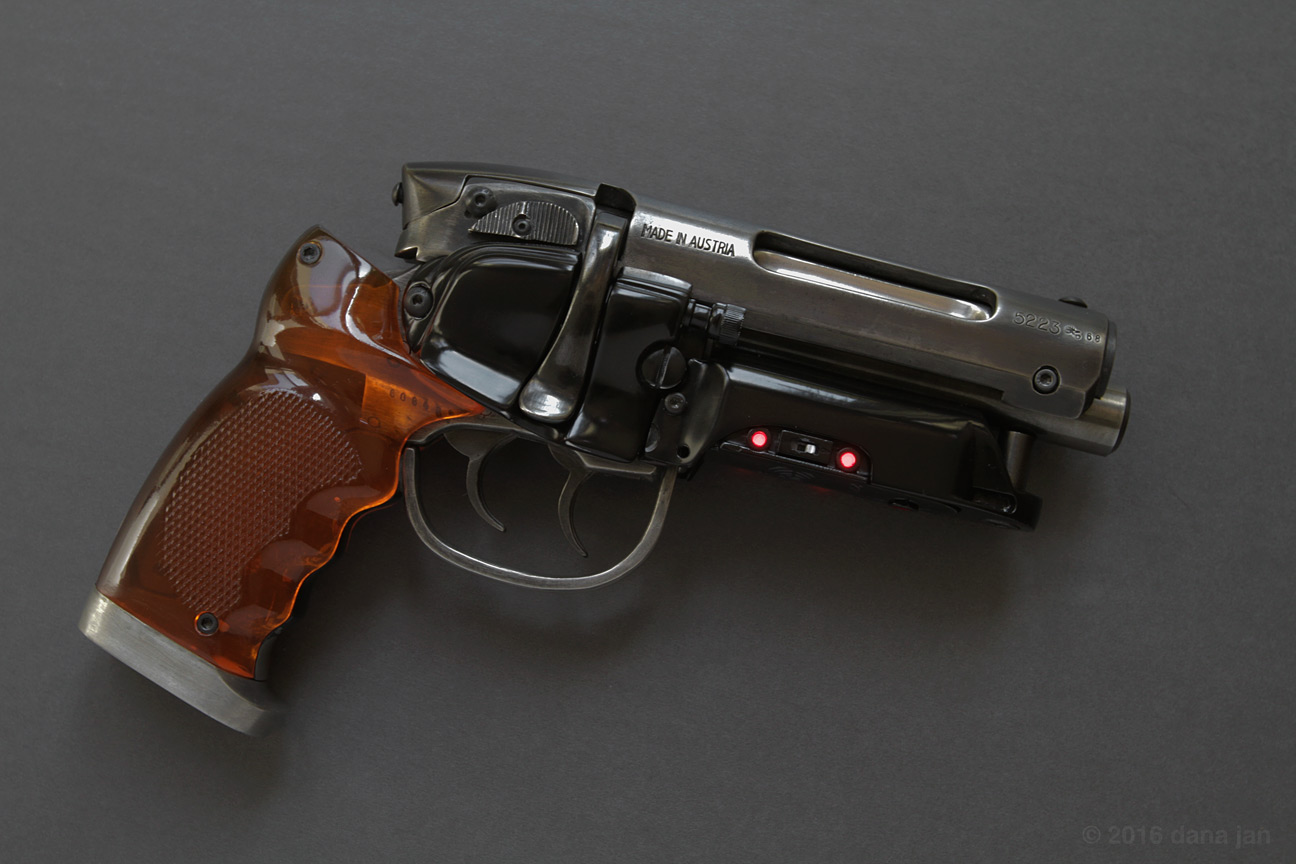
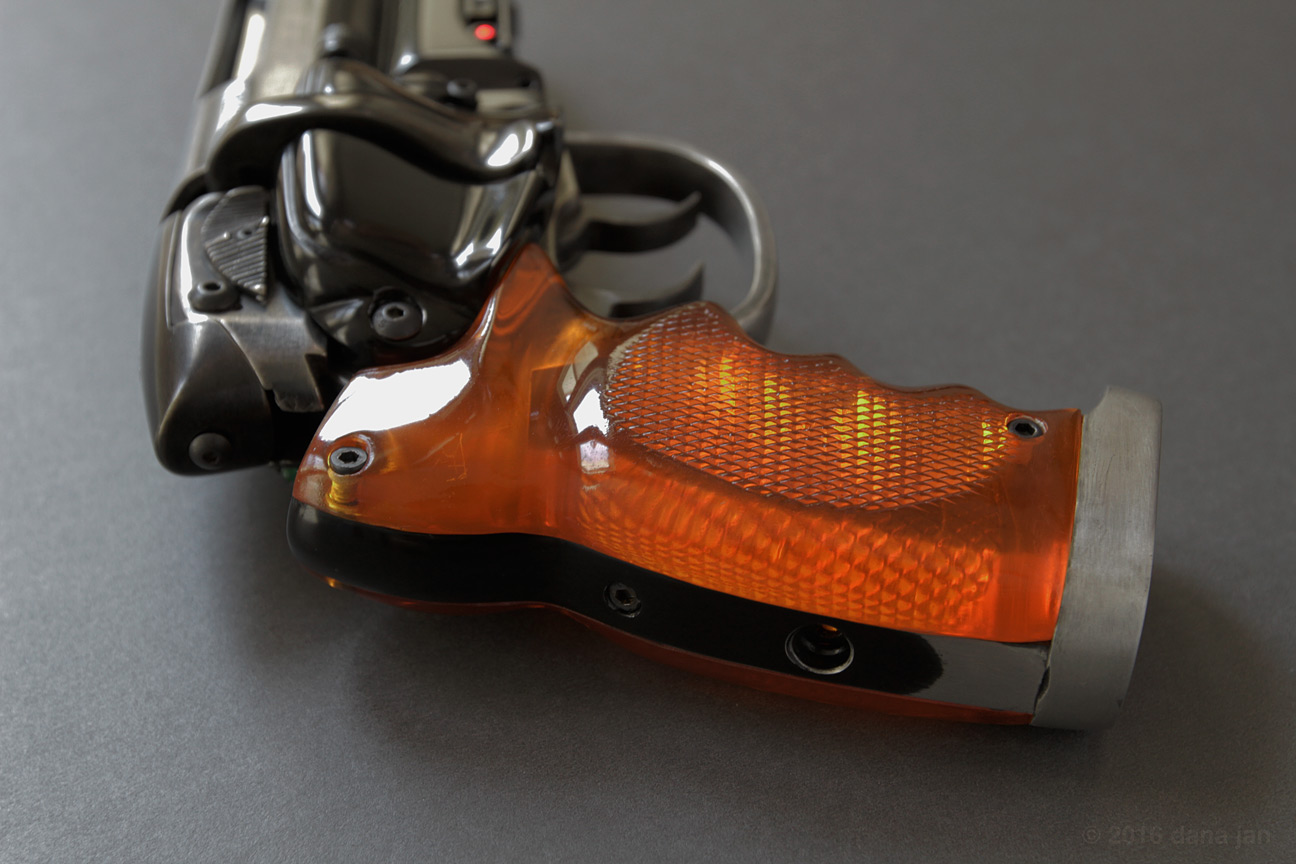
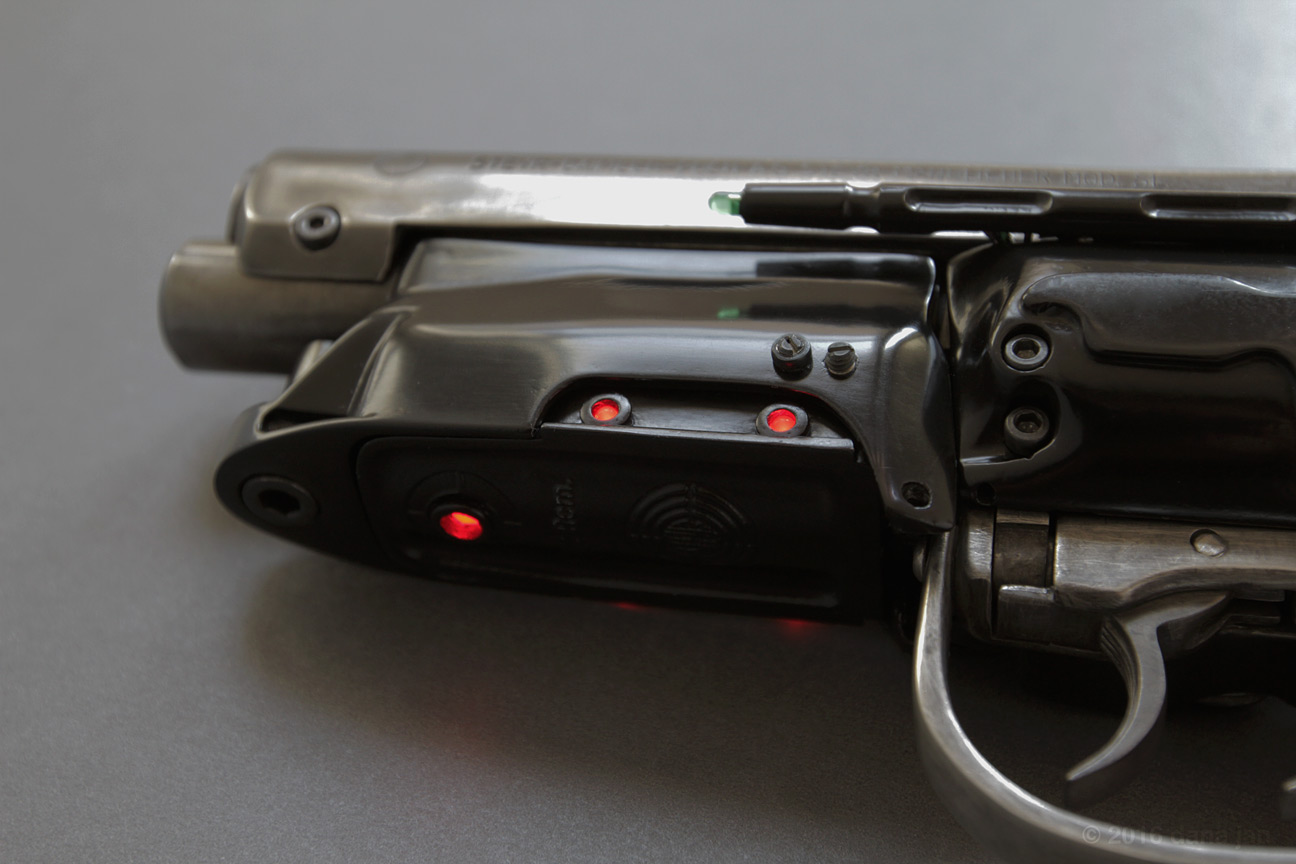
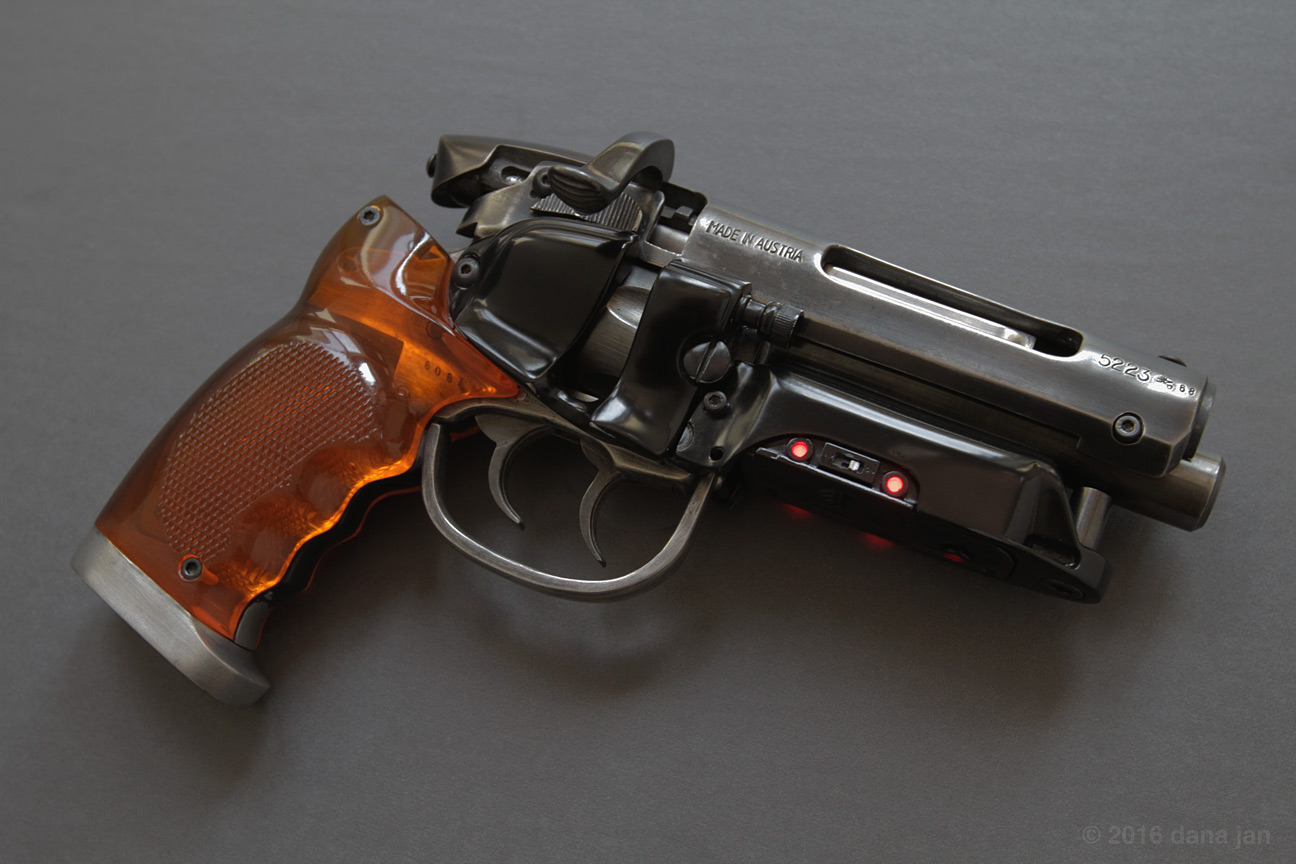


Hello! I've been a long time member here but in all honesty I haven't had much to contribute. So, I feel like this is my chance to start. I just finished this blaster today but the journey began nearly a decade ago when I purchased a kit from Siderio in 2006. It was a pre-WorldCon kit. Long story short, I managed to get some more accurate parts from Siderio and Michele a few years later, followed by a steel barrel and sight rod from members here and some small details from Rich to make the ammo housing more accurate. Karl's WorldCon photos have to be mentioned here as they were essential. Thank you Karl! I've worked on this kit on/off for years. I really took my time and enjoyed the build even when it frustrated me. I can say in all honesty that my obsession with this piece forced me to start/stop working on it many times over the years. I learned so much about this prop as a result.
I've done a bunch of customizing to the base parts (too many to list). If anyone wants to know more about my build, I'll certainly type more details. Just ask. I was aiming to recreate the blaster as I remember it in the film and not the blaster as it is today. I blued steel parts, blackened pewter, zinc, and aluminum parts and painted and polished anything else that needed it to achieve the finish you see above. I chose to leave some of the more subtle metal defects in and added some hints of weathering here and there. I didn't want it to look too perfect, but also not to look like it had been abused.
I have some photos of my blaster is various states of completion, some highlight certain modifications or important milestones in my build. I'll organize those soon and post some. Hopefully some of those will help/inspire others who aim to build one of these in the future.
Thanks for checking in,
-Dana |
|
| Back to top |
|
|
|
|
 |
|
 |
|
|
|
|
| Author |
Message |
Dascoyne
Community Member
Joined: 03 Oct 2011
Posts: 114
|
| Posted: Mon Aug 01, 2016 12:21 am Post subject: |
|
|
That is stunning work, Dana!
That deblued receiver is particularly nice. When folks just leave the receiver in the white it never looks right.
Thank you for sharing.
Very handsome sidearm. |
|
| Back to top |
|
|
|
|
|
|
|
|
|
|
|
| Author |
Message |
Buch
Community Member

Joined: 27 Feb 2014
Posts: 1184
Location: Copenhagen, Denmark
|
| Posted: Mon Aug 01, 2016 4:15 am Post subject: |
|
|
Very nice! Thanks for sharing...
I'm building a Coyle kit soon with pretty much the same look 
_________________
Monsieur, azonnal kövessen engem bitte |
|
| Back to top |
|
|
|
|
|
|
|
|
|
|
|
| Author |
Message |
Staar
Community Member

Joined: 04 Feb 2008
Posts: 757
Location: AUSTRALIA
|
| Posted: Mon Aug 01, 2016 7:47 am Post subject: |
|
|
That is simply stunning!!
Bravo and thank you for sharing, your work is inspirational.
High regards
MARK
_________________
 |
|
| Back to top |
|
|
|
|
|
|
|
|
|
|
|
| Author |
Message |
DVD Connoisseur
Community Member
Joined: 25 Nov 2007
Posts: 230
Location: UK
|
| Posted: Mon Aug 01, 2016 8:30 am Post subject: |
|
|
| Amazing work, Dana. Exceptional blaster - very authentic. |
|
| Back to top |
|
|
|
|
|
|
|
|
|
|
|
| Author |
Message |
eltee
Community Member
Joined: 31 Oct 2006
Posts: 437
Location: West Coast USA
|
| Posted: Mon Aug 01, 2016 12:15 pm Post subject: |
|
|
WHAT A BEAUTY! Nice, very nice.
 |
|
| Back to top |
|
|
|
|
|
|
|
|
|
|
|
| Author |
Message |
hirohawa
Community Member

Joined: 18 May 2006
Posts: 1067
|
| Posted: Mon Aug 01, 2016 3:08 pm Post subject: |
|
|
| Gorgeous build and photos! |
|
| Back to top |
|
|
|
|
|
|
|
|
|
|
|
| Author |
Message |
cratercritter
Community Member
Joined: 15 Jul 2009
Posts: 558
|
| Posted: Mon Aug 01, 2016 9:00 pm Post subject: |
|
|
| Thanks for posting the great photos. All that hard work and patience has paid off with a stunning looking blaster. |
|
| Back to top |
|
|
|
|
|
|
|
|
|
|
|
| Author |
Message |
veektohr
Community Member
Joined: 26 Feb 2016
Posts: 237
Location: Los Angeles
|
| Posted: Tue Aug 02, 2016 11:33 am Post subject: |
|
|
Beautiful blaster!! Still amazes me how my eyes never get tired of looking at these  Fantastic photos as well! Fantastic photos as well! |
|
| Back to top |
|
|
|
|
|
|
|
|
|
|
|
| Author |
Message |
QuartZ
Community Member
Joined: 21 May 2007
Posts: 25
|
| Posted: Tue Aug 02, 2016 3:31 pm Post subject: |
|
|
Thank you all so much for the kind remarks! Especially coming from some of our community's most critical and esteemed members. Again, my thanks to all of you. These forums have long been an inspiration for me. Many of your builds have inspired me and kept me motivated to continue improving my own replica. I can only hope to do the same for others as a way of saying thank you.
As I mentioned earlier above, I'm currently getting together some of the interesting photos I took along the way to show a few glimpses of some of the choices/changes I made. So look for those soon.
In case anyone is wondering about how I shot the photos, they were taken with my Canon 7D using a 16-35mm L lens with the blaster sitting on a piece of dark grey foam core as a backdrop. I placed it on the floor near a window to get the key light and used a white piece of poster board as a reflector to bounce some light back at the blaster to fill in/soften some of the shadows.
Thanks again,
-Dana |
|
| Back to top |
|
|
|
|
|
|
|
|
|
|
|
| Author |
Message |
joberg
Community Member
.jpg)
Joined: 06 Oct 2008
Posts: 9447
|
| Posted: Tue Aug 02, 2016 7:25 pm Post subject: |
|
|
Clean build and sharp prop. Congrats all around  |
|
| Back to top |
|
|
|
|
|
|
|
|
|
|
|
| Author |
Message |
jameth
Community Member
Joined: 02 Feb 2010
Posts: 825
|
| Posted: Wed Aug 03, 2016 12:51 pm Post subject: |
|
|
Wow!!!!!!!!!!!!!!!!!!!!!!!!!!
Well done!!
_________________
Tom |
|
| Back to top |
|
|
|
|
|
|
|
|
|
|
|
| Author |
Message |
Nexus7
Community Member

Joined: 13 Sep 2014
Posts: 440
Location: New York Metro Area
|
| Posted: Wed Aug 03, 2016 5:53 pm Post subject: |
|
|
| Awesome job! |
|
| Back to top |
|
|
|
|
|
|
|
|
|
|
|
| Author |
Message |
Robotprops
Community Member
Joined: 11 Apr 2010
Posts: 280
Location: Vancouver, B.C.
|
| Posted: Sun Aug 07, 2016 2:19 am Post subject: |
|
|
| Outstanding! |
|
| Back to top |
|
|
|
|
|
|
|
|
|
|
|
| Author |
Message |
Pro Mod
Community Member
Joined: 13 Aug 2010
Posts: 108
Location: Manchester, England
|
| Posted: Sun Aug 07, 2016 12:21 pm Post subject: |
|
|
| Great build. |
|
| Back to top |
|
|
|
|
|
|
|
|
|
|
|
| Author |
Message |
hirohawa
Community Member
Joined: 18 May 2006
Posts: 1067
|
| Posted: Sun Aug 07, 2016 2:22 pm Post subject: |
|
|
| Would like to see work in progress pics. |
|
| Back to top |
|
|
|
|
|
|
|
|
|
|
|
| Author |
Message |
veektohr
Community Member
Joined: 26 Feb 2016
Posts: 237
Location: Los Angeles
|
| Posted: Sun Aug 07, 2016 2:41 pm Post subject: |
|
|
| WIP shots would be awesome!! |
|
| Back to top |
|
|
|
|
|
|
|
|
|
|
|
| Author |
Message |
QuartZ
Community Member
Joined: 21 May 2007
Posts: 25
|
| Posted: Tue Aug 09, 2016 10:36 am Post subject: |
|
|
Once again, thank you for the support. Now let's see some work in progress shots. Due to the build spanning so many years, I can't find some of the photos I'm looking for, but I'll speak to what I can with the images I do have.
Ok, let's start at the beginning. Here's a photo of the kit early on. It has the pre Worldcon grip frame, too many flathead screws in the Bulldog grip frame, cast metal barrel and ammo housing, no serial number stamped and cast set screws in the Styer receiver. Overall, it's pretty much bone stock assembled. I also don't believe any surface prep or polish has happened at this point. The pewter has a dull to satin sheen and you can see just how good the castings are in terms of fit and finish out of the box.

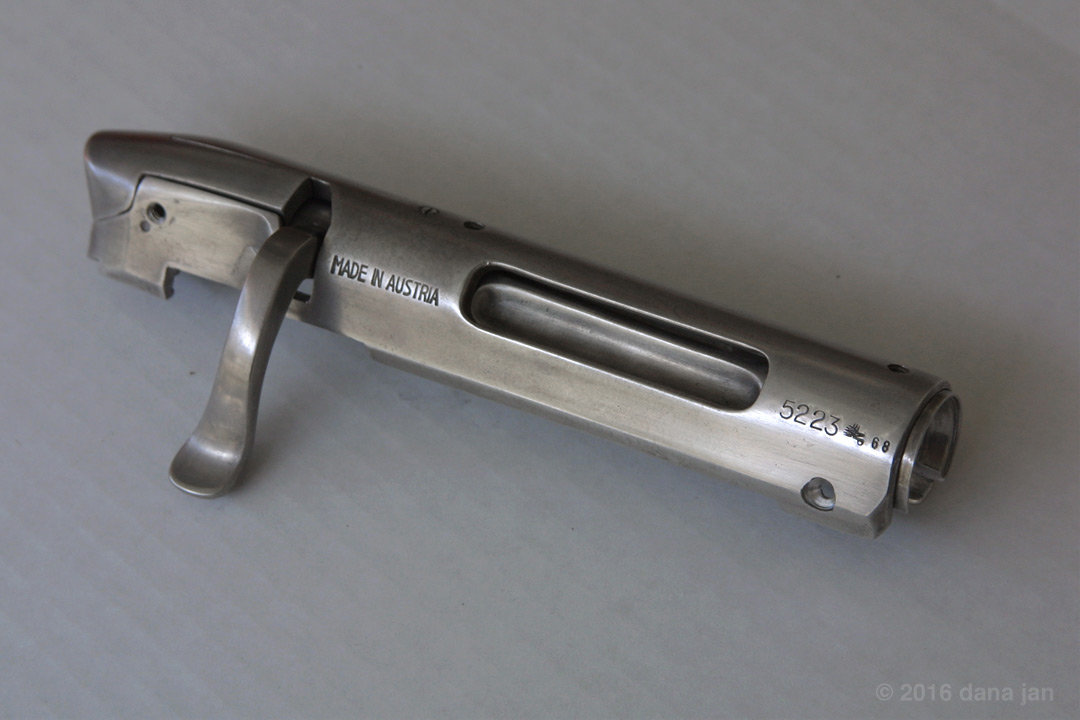
In the next photo, I've begun to upgrade the Steyr receiver. I purchased several letter/# punches to do this work and I remember how worried I was about this step. I marked the receiver with a sharpie, lined up a # and struck it with a hammer. I supported the inside of the casting with a wood dowel to prevent distorting the overall receiver shape (pewter is a soft metal). I didn't have anything to recreate the mark between the 5223 and the year 68 so I had to wing it. I don't remember having super-clear images of the original mark either, so this was the best I could do in the spirit of the original. I did also punch the markings on the underside of the bolt lever/handle (not pictured). I've also started to drill out the cast in set screws on top of the receiver to be replaced with real screws later. There's also seemed to be a set screw/scope mount hole missing at the front end (not 3 out of 4 up top).
More to come. Thanks,
-Dana |
|
| Back to top |
|
|
|
|
|
|
|
|
|
|
|
| Author |
Message |
veektohr
Community Member
Joined: 26 Feb 2016
Posts: 237
Location: Los Angeles
|
| Posted: Tue Aug 09, 2016 11:53 am Post subject: |
|
|
Amazing. I recently commissioned a set of stamps that match the markings on a c96 Mauser for a project I'm planning. Did you just find the numbers and symbol online? They match very well.
This makes we want to start on the Sid I've had in the project closet for too long! |
|
| Back to top |
|
|
|
|
|
|
|
|
|
|
|
| Author |
Message |
Buch
Community Member
Joined: 27 Feb 2014
Posts: 1184
Location: Copenhagen, Denmark
|
| Posted: Tue Aug 09, 2016 12:48 pm Post subject: |
|
|
| veektohr wrote: | Amazing. I recently commissioned a set of stamps that match the markings on a c96 Mauser for a project I'm planning. Did you just find the numbers and symbol online? They match very well.
This makes we want to start on the Sid I've had in the project closet for too long! |
Like these?
.jpg)
_________________
Monsieur, azonnal kövessen engem bitte |
|
| Back to top |
|
|
|
|
|
|
|
|
|
|
|
|
You cannot post new topics in this forum
You cannot reply to topics in this forum
You cannot edit your posts in this forum
You cannot delete your posts in this forum
You cannot vote in polls in this forum
|
|
|
|
|
|
|
|


