 |
 |
|
 |
|
| Author |
Message |
SKIN JOB 66
Community Member

Joined: 16 Jan 2008
Posts: 2724
Location: FRANCE
|
 Posted: Mon May 04, 2009 3:07 am Post subject: Re: MIkes Nosttromo Posted: Mon May 04, 2009 3:07 am Post subject: Re: MIkes Nosttromo |
 |
|
| jtparker wrote: |

|
WOW JT, great pics !!! Those thrusters are amazing !!! GREAT detailing, indeed !!! Can't wait to see more !!! (Yes, noticed "the professor" has registered here last WE...)

Fred
PS : BTW, do you know if everybody is doing the screen-accurate version ? Any yellow Nostormo in the works from one of your customers ???
_________________
THE FUTURE IS A THING OF THE PAST |
|
| Back to top |
|
|
|
|
 |
|
 |
|
|
|
|
| Author |
Message |
Mark Sheppard
Community Member

Joined: 18 Apr 2009
Posts: 951
Location: In my office playing golf, pouring drinks, making deals.
|
| Posted: Mon May 04, 2009 9:28 am Post subject: |
|
|
My MOdel is actually taken from the yellow version, sans Thruster unit in front and detailing from that version... I suppose you could do it  |
|
| Back to top |
|
|
|
|
|
|
|
|
|
|
|
| Author |
Message |
joberg
Community Member
.jpg)
Joined: 06 Oct 2008
Posts: 9447
|
| Posted: Mon May 04, 2009 11:44 am Post subject: |
|
|
Very appropriate box to put your hull on  |
|
| Back to top |
|
|
|
|
|
|
|
|
|
|
|
| Author |
Message |
Mark Sheppard
Community Member
Joined: 18 Apr 2009
Posts: 951
Location: In my office playing golf, pouring drinks, making deals.
|
| Posted: Tue May 05, 2009 12:36 am Post subject: |
|
|
| joberg wrote: | | Very appropriate box to put your hull on |
Yeah, Mike has a better camera than mine, the detail on his model really shows up well here, His Nostromo will be finished before mine, I told him to get registered on this site so he can be introduced here. I sent him his kit about 3 weeks ago or so, and he is progressing much faster than mine 
and an appropriate box.....  |
|
| Back to top |
|
|
|
|
|
|
|
|
|
|
|
| Author |
Message |
SKIN JOB 66
Community Member
Joined: 16 Jan 2008
Posts: 2724
Location: FRANCE
|
| Posted: Tue May 05, 2009 5:26 pm Post subject: |
|
|
| jtparker wrote: | | My MOdel is actually taken from the yellow version, sans Thruster unit in front and detailing from that version... I suppose you could do it |
Goddamn NO, your wonderful model really deserves to be built has the screen-used ship !!! I'd rather turn my Halcyon Nostromo into the yellow version when I have time to work on this !
Fred
_________________
THE FUTURE IS A THING OF THE PAST |
|
| Back to top |
|
|
|
|
|
|
|
|
|
|
|
| Author |
Message |
Mark Sheppard
Community Member
Joined: 18 Apr 2009
Posts: 951
Location: In my office playing golf, pouring drinks, making deals.
|
| Posted: Thu May 07, 2009 11:37 pm Post subject: |
|
|
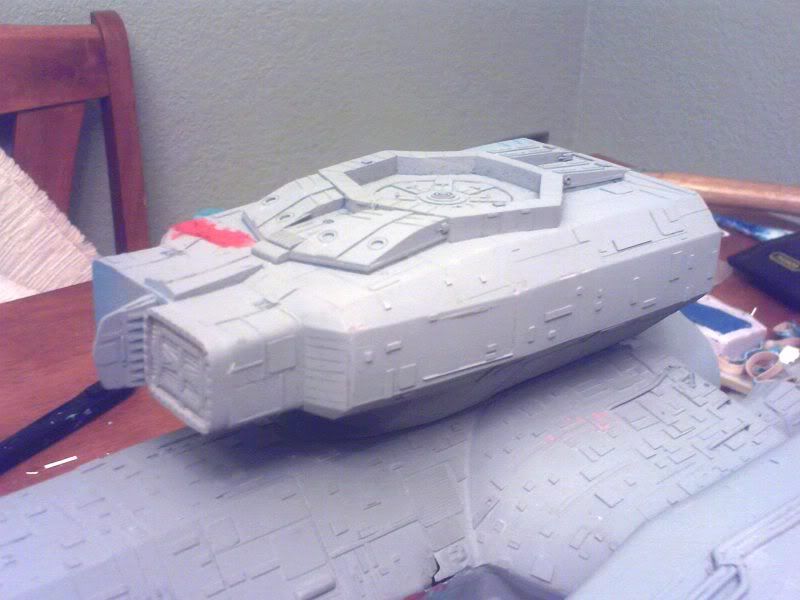
Starting the finishing touches on the bridge before final assembly...
 |
|
| Back to top |
|
|
|
|
|
|
|
|
|
|
|
| Author |
Message |
SKIN JOB 66
Community Member
Joined: 16 Jan 2008
Posts: 2724
Location: FRANCE
|
| Posted: Fri May 08, 2009 4:32 am Post subject: |
|
|
It alreday looks like the real thing... but I can't wait to see the front completed with the radar dish, antennas, windows and docking arm !!!
Considering the size of your model, do you think it would be worth it to try to print a set of small decals to reproduce the markings seen aside the cockpit windows ?
Fred
_________________
THE FUTURE IS A THING OF THE PAST |
|
| Back to top |
|
|
|
|
|
|
|
|
|
|
|
| Author |
Message |
Mark Sheppard
Community Member
Joined: 18 Apr 2009
Posts: 951
Location: In my office playing golf, pouring drinks, making deals.
|
| Posted: Sun May 10, 2009 3:11 am Post subject: |
|
|
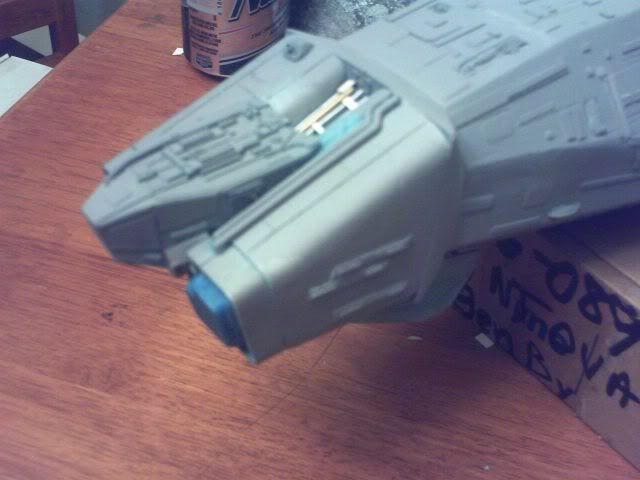
...and now starting the "tow module" (Umbilicus Interface).....
Here I have started to assemble the shell halves and an intake on the front of the module. The side I added some extra vinyl as I am going to do a bunch of details. The interlock section has fantastic detail, so that I am not even going to touch that part. I have applied a small bit of oil based painters putty to the joints, then sanded smooth with a light coat of gray primer for a nice fit.
 |
|
| Back to top |
|
|
|
|
|
|
|
|
|
|
|
| Author |
Message |
Knightjar
Community Member

Joined: 25 Apr 2009
Posts: 14
|
| Posted: Sun May 10, 2009 3:40 pm Post subject: |
|
|
Hope this is the right place to post this - I don't want to hijack your build thread, JT.
I decided to have a go at sculpting a scale Nostromo astronaut while I get my funds together to buy one of these kits. It came out fractionally larger than I'd intended - it measures about 4mm. Still needs a bit of a clean up, but I think it will do the job. I hope to cast them in clear resin and light them from underneath so that the helmet lights will seem to illuminate. Making a functional mold for a figure this size is going to be a challenge!
 |
|
| Back to top |
|
|
|
|
|
|
|
|
|
|
|
| Author |
Message |
Mark Sheppard
Community Member
Joined: 18 Apr 2009
Posts: 951
Location: In my office playing golf, pouring drinks, making deals.
|
| Posted: Sun May 10, 2009 3:47 pm Post subject: |
|
|
WOW!!!!!!!!!!!!!!!!!
That is fantastic! This thread is the perfect Place for it! |
|
| Back to top |
|
|
|
|
|
|
|
|
|
|
|
| Author |
Message |
blipper
Joined: 25 Apr 2009
Posts: 6
Location: England
|
| Posted: Sun May 10, 2009 4:14 pm Post subject: |
|
|
That is an excellent idea Knightjar, and nice start.
Love the progress parker, great work. |
|
| Back to top |
|
|
|
|
|
|
|
|
|
|
|
| Author |
Message |
SKIN JOB 66
Community Member
Joined: 16 Jan 2008
Posts: 2724
Location: FRANCE
|
| Posted: Sun May 10, 2009 4:49 pm Post subject: |
|
|
WOW, cool idea and great sculp (considering its size), Knightjar !
Are you also going to work on a sculpt of Ash in his blister ? (just kidding)
Fred
_________________
THE FUTURE IS A THING OF THE PAST |
|
| Back to top |
|
|
|
|
|
|
|
|
|
|
|
| Author |
Message |
Knightjar
Community Member
Joined: 25 Apr 2009
Posts: 14
|
| Posted: Sun May 10, 2009 5:17 pm Post subject: |
|
|
Thanks for the kind words everyone!
| SKIN JOB 66 wrote: |
Are you also going to work on a sculpt of Ash in his blister ? (just kidding)
|
Actually that's got me thinking now...! Lighted interiors of the cockpit/bridge and Ash's blister would be extremely cool. |
|
| Back to top |
|
|
|
|
|
|
|
|
|
|
|
| Author |
Message |
SKIN JOB 66
Community Member
Joined: 16 Jan 2008
Posts: 2724
Location: FRANCE
|
| Posted: Sun May 10, 2009 5:24 pm Post subject: |
|
|
| Knightjar wrote: |
Actually that's got me thinking now...! Lighted interiors of the cockpit/bridge and Ash's blister would be extremely cool. |
_________________
THE FUTURE IS A THING OF THE PAST |
|
| Back to top |
|
|
|
|
|
|
|
|
|
|
|
| Author |
Message |
Mark Sheppard
Community Member
Joined: 18 Apr 2009
Posts: 951
Location: In my office playing golf, pouring drinks, making deals.
|
| Posted: Sun May 10, 2009 5:31 pm Post subject: |
|
|
| Now I guess I will need to cast the bridge and windows in clear resin... |
|
| Back to top |
|
|
|
|
|
|
|
|
|
|
|
| Author |
Message |
blipper
Joined: 25 Apr 2009
Posts: 6
Location: England
|
| Posted: Sun May 10, 2009 5:32 pm Post subject: |
|
|
| It's a MUST Knightjar! If I'm ever able to get this kit I'd love to detail (ability withstanding) the bridge interior, perhaps have a crew member standing inside near one of the bridge ports. |
|
| Back to top |
|
|
|
|
|
|
|
|
|
|
|
| Author |
Message |
Knightjar
Community Member
Joined: 25 Apr 2009
Posts: 14
|
| Posted: Tue May 12, 2009 6:20 am Post subject: |
|
|
| jtparker wrote: | | Now I guess I will need to cast the bridge and windows in clear resin... |
That would be perfect for lighting, but might not work as well with an interior. Both sets of windows are angled, so I think you'd get a prism effect that would distort your view of the interior. Maybe they could be vac-formed in clear plastic? Alternatively, actually embedding a painted interior in clear resin might work - or it might just look horribly distorted too! |
|
| Back to top |
|
|
|
|
|
|
|
|
|
|
|
| Author |
Message |
beal
Community Member

Joined: 01 Nov 2006
Posts: 19
Location: NYC
|
| Posted: Tue May 12, 2009 6:50 pm Post subject: |
|
|
Hey Parker that Nostromo is looking gorgeous.
One of the classic starship designs, that definitely deserves a thread all it's own.
Thanks, please keep the updates coming |
|
| Back to top |
|
|
|
|
|
|
|
|
|
|
|
| Author |
Message |
theprofessor
Joined: 02 May 2009
Posts: 4
|
| Posted: Tue May 12, 2009 11:31 pm Post subject: |
|
|
Hey JT and everybody!!!
Working on JT's Nostromo and have been puttying like a madman and sanding. The massive top part where the ship connects to the refinery is where I have been primarily working and have just puttied a little more to close some gaps and fill in some stuff. Once that is sanded I will start adding vinyl strips and model kit greeblies to this part. Next will be the main hull/fuselage than the nacelles. Lots of vinyl and plastic strips to put on will hide any imperfections and really make this thing look like its screen used counterparts. I plan to go crazy with the greeblies as I have a crapload of unused model kit parts.
See ya! |
|
| Back to top |
|
|
|
|
|
|
|
|
|
|
|
| Author |
Message |
Mark Sheppard
Community Member
Joined: 18 Apr 2009
Posts: 951
Location: In my office playing golf, pouring drinks, making deals.
|
| Posted: Wed May 13, 2009 12:02 am Post subject: |
|
|
Very cool Professor!
We cannot wait to get some of your pictures posted here, feel free!
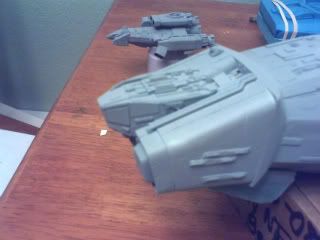
The next kit goes out to Skinjob66, I am having to remold the Starboard Nacelle as the mold blew when I did your kit: ( I will forward you the templates to make the VTOL thrusters more accurate. They are getting remolded since I need to remold the other side anyway....In this pic you can see a little crack in the hull (actually a thin spot to be puttied later..the hull is a few pounds) this was the first hull I ever did, even though I used 40 ounces of resin, so I kept this hull for myself cos it is still usable and straight. 8 of the 10 last hulls I have done are perfect, but these are 35 pound mother molds with silicon and 40 ounces of resin I rotocast by hand myself for 15 minutes. It is better than working out in a gym aside from remolding the forward nacelles, Skinjobs is almost done.
Here is my Docking interface module with a first coat of detail:
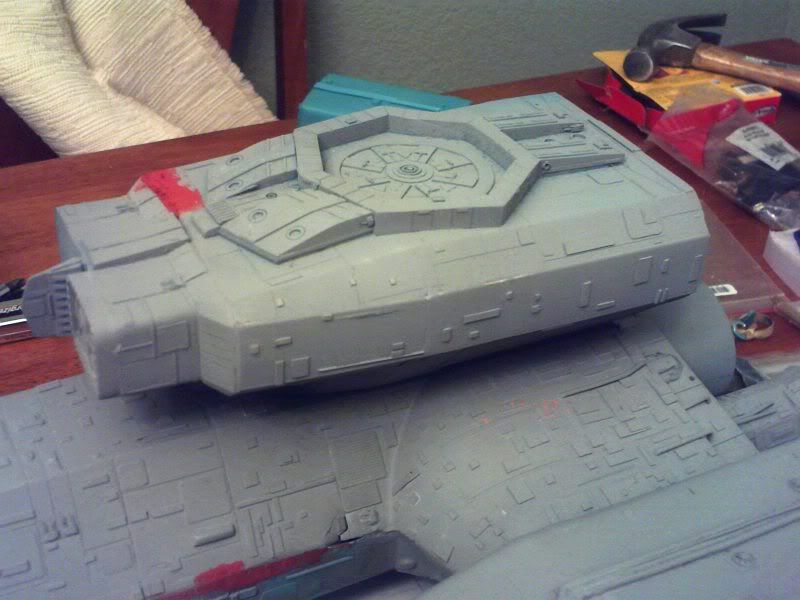
and here is applying some cheap solvent based painters putty and light sandpaper to the seams.. I actually applied vinyl along the sides before the detailing I started...
 |
|
| Back to top |
|
|
|
|
|
|
|
|
|
|
|
|
You cannot post new topics in this forum
You cannot reply to topics in this forum
You cannot edit your posts in this forum
You cannot delete your posts in this forum
You cannot vote in polls in this forum
|
|
|
|
|
|
|
|


