|
 |
|
 |
|
| Author |
Message |
Nexus6
Community Member

Joined: 15 May 2006
Posts: 473
Location: Off-World Colonies
|
 Posted: Wed Apr 16, 2008 10:21 am Post subject: Re: Rick Ross's PKD-1 re-issue Posted: Wed Apr 16, 2008 10:21 am Post subject: Re: Rick Ross's PKD-1 re-issue |
 |
|
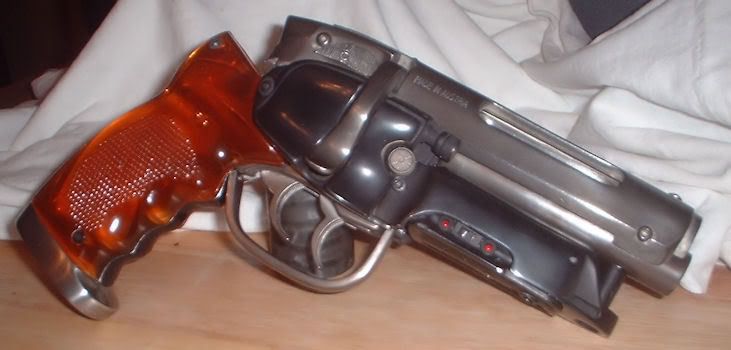
| Batty wrote: | I thought I should add my newly completed PKD-1 re-issue to the comparison since there aren't any here yet.
awesome1.jpg
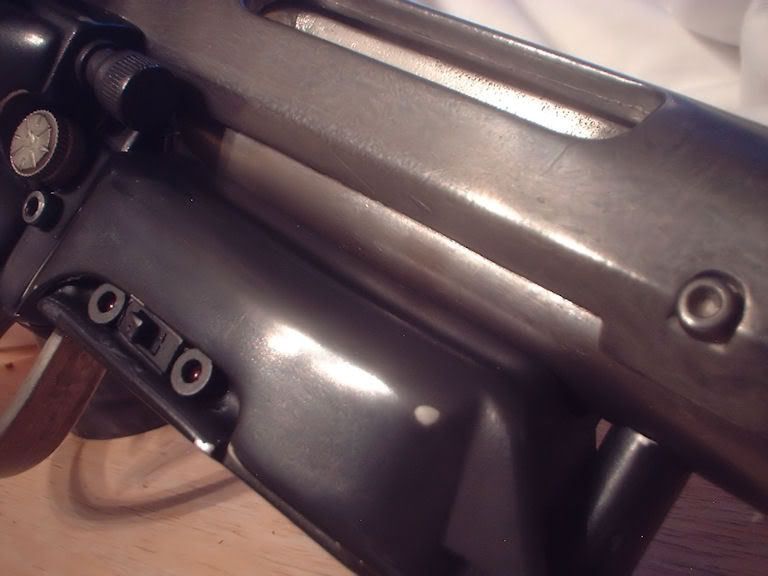
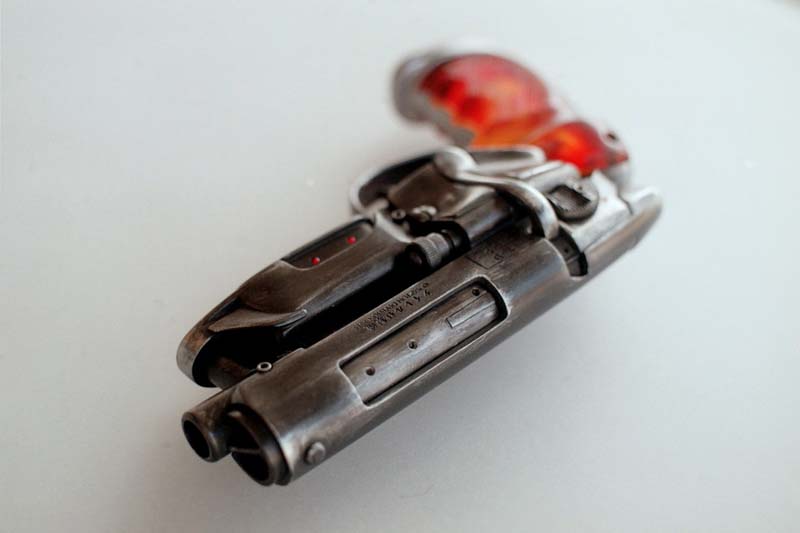
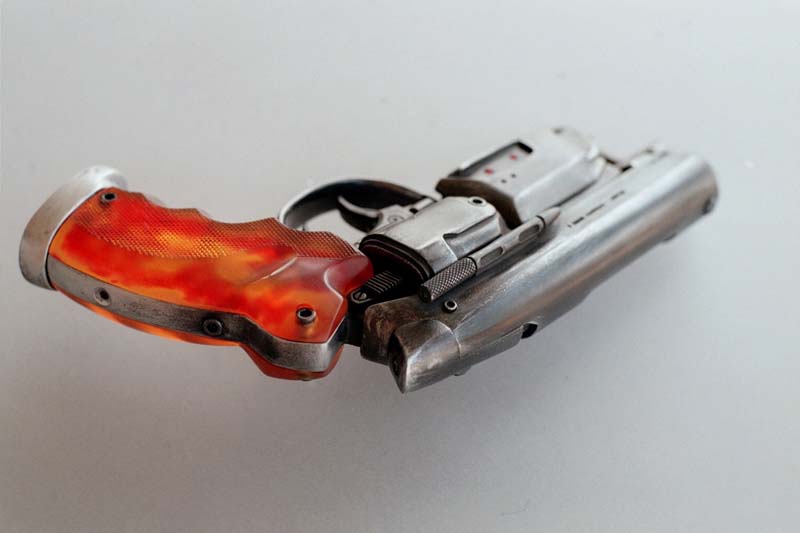
Here's some more shots.
awesome2.jpg
awesome3.jpg
awesome4.jpg
awesome5.jpg
awesome6.jpg |
That is an EXCELLENT job.
Would you mind providing a few details on how you painted/weathered the piece? |
|
| Back to top |
|
|
|
|
 |
|
 |
|
|
|
|
| Author |
Message |
Batty
Community Member

Joined: 17 Feb 2008
Posts: 15
|
| Posted: Wed Apr 16, 2008 5:52 pm Post subject: |
|
|
Whoops. Those PKD-1 photos were a bit big. Here they are again at a more viewable size.
and more...
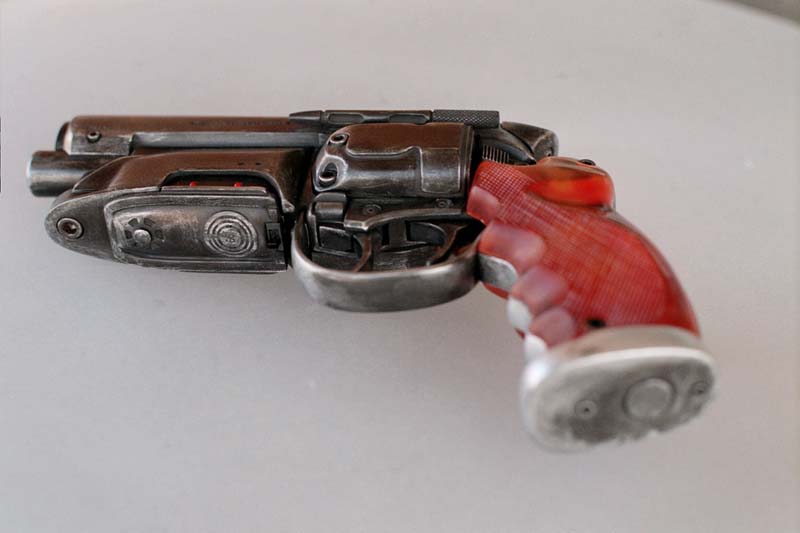
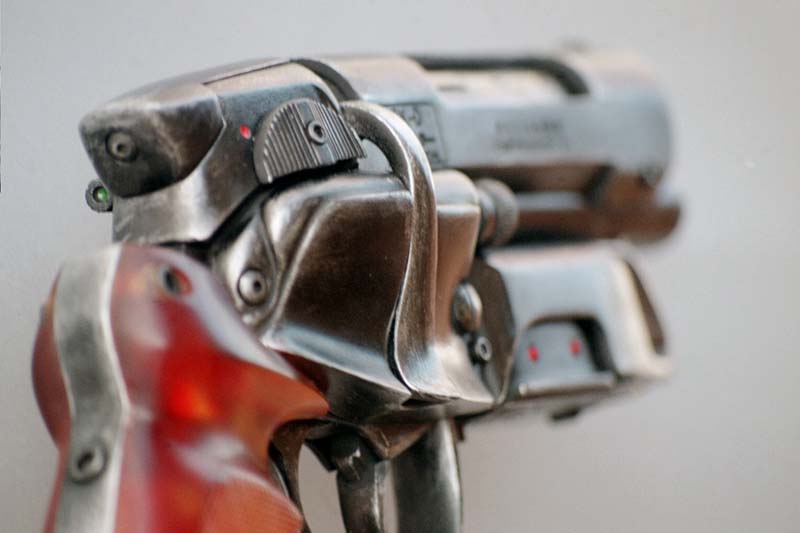

For the finish I followed Rick Ross's suggestions with a few variations.
First I sprayed a few coats of flat black primer wet sanding in between.
Then I applied black Rub 'n Buff with a finger over all surfaces I could get into. Finally I used silver Rub 'n Buff to simulate wear and tear and holster rub etc.
I did notice though that just the flat primer when sanded with 1000 grit came up to a very realistic looking shine. The black Rub 'n Buff gave an authentic looking gun blue shine. All finished with a bit of buffing with a dry cloth.
For extra realism I replaced all the molded screws with corresponding real ones. To give the blaster a more realistic heft and look, I drilled out the barrel all the way back and 3/4 filled it with lead shot.
Also I made the grips a bit more interesting by painting the backs with a clear reddish brown shellac and sanded bits of it off to give a bit of a tortoise shell look
An awesome kit in every way. Rick Ross is the Man.
_________________
Good evening JF! |
|
| Back to top |
|
|
|
|
|
|
|
|
|
|
|
| Author |
Message |
andy
Community Guide

Joined: 01 Nov 2006
Posts: 6237
Location: Rochester, NY
|
| Posted: Wed Apr 16, 2008 8:39 pm Post subject: |
|
|
Awsome! I do love seeing the PKD1 all gussied up. Great job.
Andy |
|
| Back to top |
|
|
|
|
|
|
|
|
|
|
|
| Author |
Message |
DeckB26354
Community Member
Joined: 24 Oct 2007
Posts: 212
|
|
| Back to top |
|
|
|
|
|
|
|
|
|
|
|
| Author |
Message |
lear60man
Community Member
Joined: 28 Mar 2008
Posts: 16
Location: California
|
| Posted: Wed Apr 23, 2008 4:39 pm Post subject: |
|
|
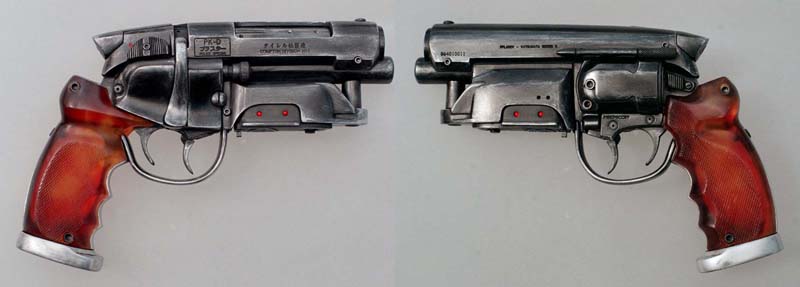
Here is an 'As Issued" pic.
 |
|
| Back to top |
|
|
|
|
|
|
|
|
|
|
|
| Author |
Message |
Dann
Community Member
Joined: 15 Apr 2008
Posts: 44
|
| Posted: Sat May 17, 2008 10:42 pm Post subject: |
|
|
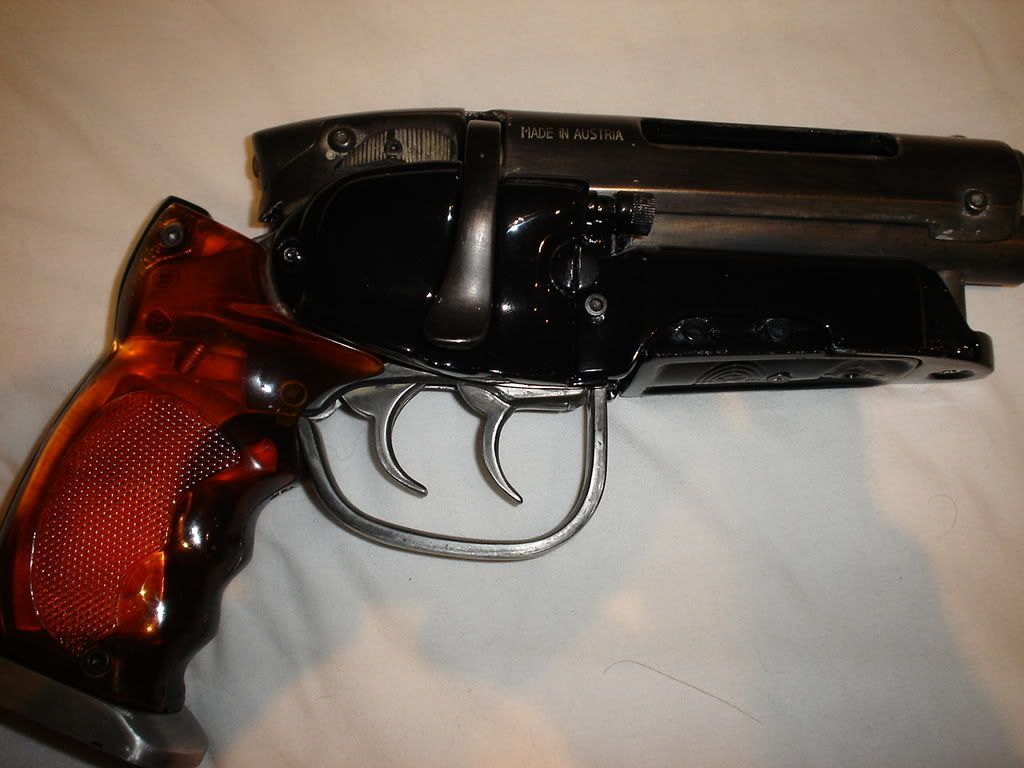
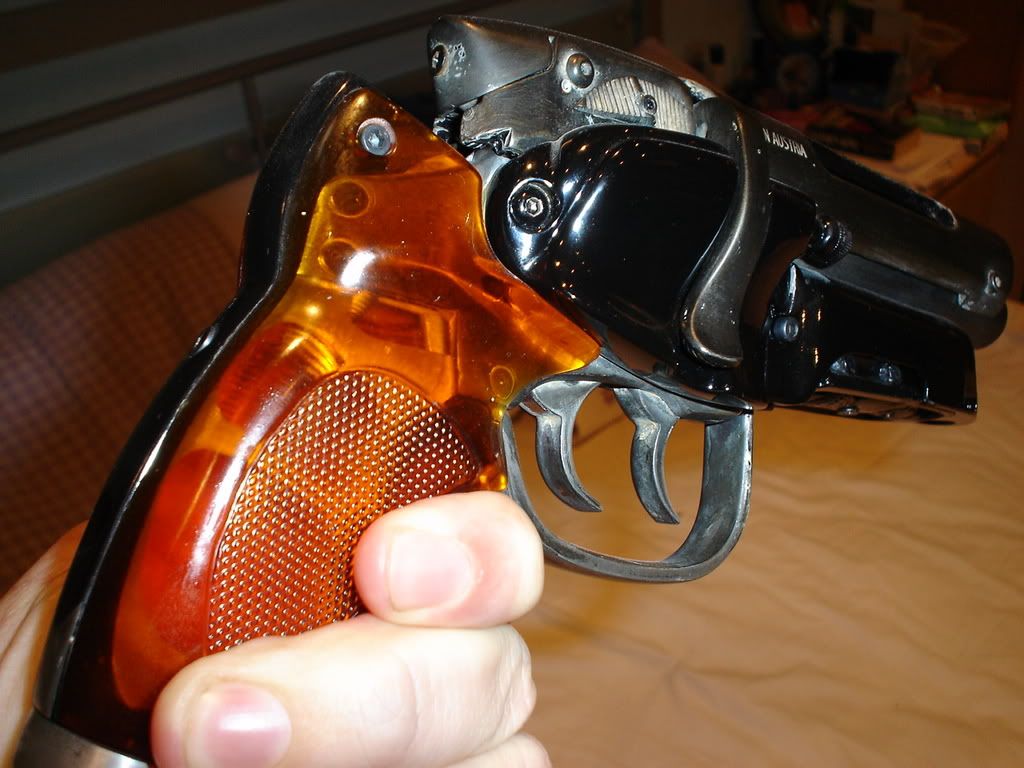
I made a few mods to my Sidkit, got the new Worldcon grips, weaver knob, dremeled out the side cover so you can see the cylinder.
I also painted the grip frame and the bottom of the butt plate.
Also used some perma blue on the bare metal parts. It's a tad darker in person.
These are thumbnails.
 
  |
|
| Back to top |
|
|
|
|
|
|
|
|
|
|
|
| Author |
Message |
hirohawa
Community Member

Joined: 18 May 2006
Posts: 1067
|
| Posted: Sun May 18, 2008 1:01 am Post subject: |
|
|
| Great job you should also post this in the worldcon froum also. |
|
| Back to top |
|
|
|
|
|
|
|
|
|
|
|
| Author |
Message |
andy
Community Guide
Joined: 01 Nov 2006
Posts: 6237
Location: Rochester, NY
|
| Posted: Mon Nov 24, 2008 12:26 am Post subject: |
|
|
Forgot about this thread so I thout it would be good to bump it up for some of these that are new and haven't seen it.
Andy |
|
| Back to top |
|
|
|
|
|
|
|
|
|
|
|
| Author |
Message |
megamicrofish
Community Member
Joined: 11 May 2008
Posts: 94
Location: UK
|
| Posted: Mon Nov 24, 2008 4:35 pm Post subject: |
|
|
here's my Sidkit

 |
|
| Back to top |
|
|
|
|
|
|
|
|
|
|
|
| Author |
Message |
Delmustator
Community Member

Joined: 10 Nov 2008
Posts: 72
Location: NC Area
|
| Posted: Mon Nov 24, 2008 4:48 pm Post subject: |
|
|
| DeckB26354 wrote: | LOL  Thanks for the kind comments. Much appreciated and I loved the jaw dropping pic! Thanks for the kind comments. Much appreciated and I loved the jaw dropping pic!
Of cause you are right, I have spent more on this than any sane person would ever dream of and now I am getting close to perfection the obsession is taking over!!
I know at the end of the day it is just a gun and all my friends walk past it without a glance........but we all know beauty is in the eye of the beholder. Right?!!!  |
Gotta be careful with that one at conventions. Get escorted out by the boys in blue if they know it's real..
I give you credit for going for authenticity. I'd love to have a real M2019 in my collection. My problem is I would have to have true caseless 10mm ammunition with armor piercing and exploding rounds. It's the ex-Army side of me coming out.
I can tell you this. If you had an intruder looking down the barrel of that baby. I'd bet it would get his attention for sure.
_________________
-Del |
|
| Back to top |
|
|
|
|
|
|
|
|
|
|
|
| Author |
Message |
doc3d
Community Member
Joined: 28 Nov 2008
Posts: 134
Location: Washington
|
| Posted: Fri Nov 28, 2008 7:59 pm Post subject: Blade Runner Blaster project |
|
|
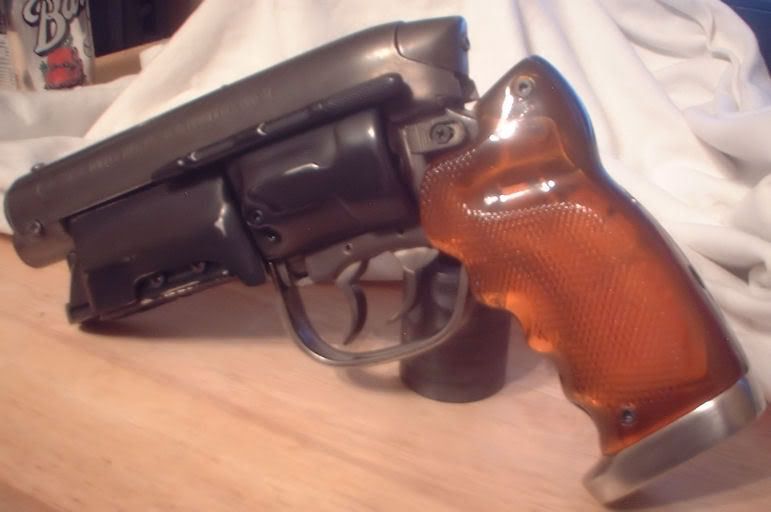
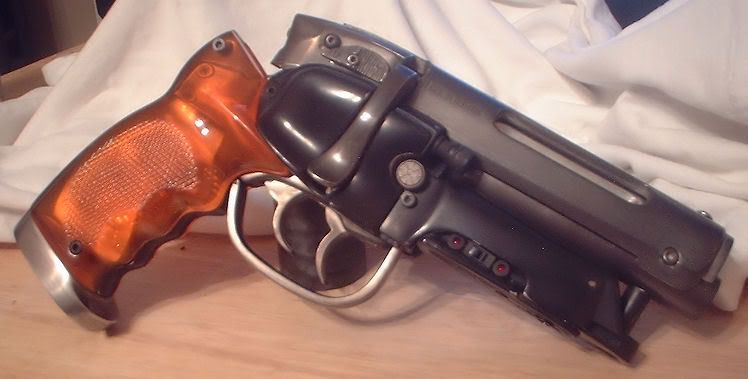
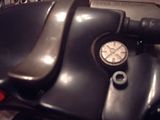
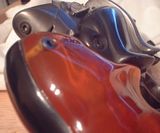
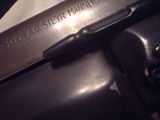
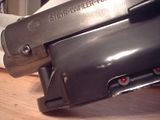
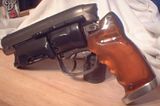
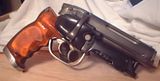
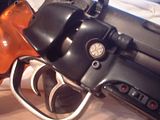
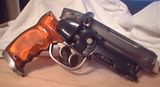
I have a few pics of the gun I'm working on, and a short video of it firing you may or may not be interested in (already posted to Blade Zone). The gun still needs a fair amount of finishing work, and the LED array added. I'm not trying to make a perfectly accurate replica, but there's one fairly significant difference-- it actually shoots real bullets, as shown in the You Tube test firing vid. It's a metal Coyle shell with a .44 Bulldog inside. I wanted to use a stock Charter Arms 4" barrel (the prop appears to have a roughly 4.5 inch barrel, measured from the breech). So I pulled the 2" barrel off my Bulldog, stuck on a factory built 4" barrel, and turned it into the "Combat Commander" version of the PKD. As you can see, it's bobbed half an inch from the movie prop length, but I did scale everything by taking some off the front length of the Steyr top so things remain proportional. I still have the main metal inset installed in the front of the Steyr top, but I left the center hole open for eventually installing a functional laser sight, hidden inside the Steyr top. Without a laser sight, there's no way to aim the thing. Should probably post a front 3/4 view, as well as making another video clip with better light (didn't really want the range master to see what I was up to during the first test...  ) )
Total cost of the project is under $700, including the Bulldog, since I worked from a Coyle parts kit, and a used Bulldog picked up cheap at a gun show.
Danger Will Robinson! Do NOT remove the extractor or the cylinder's front locking sleeve if you attempt to make a bullet or blank firing prop (which I don't recommend doing in any case unless you really know a fair amount about gunsmithing). Yes, it will allow the cylinder to swing out without having to remove the Steyr magazine housing. It will also allow you to misalign the cylinder front with the barrel, creating a potential grenade if there's live ammo up the pipe. (I did my test fire with 200 grain lead round nose cartridges, loaded to 700 FPS, and a sandbag between the gun and my head). If you can swing out the cylinder with the extractor and sleeve lopped on the original movie gun, you can be sure no one but a fool would ever have loaded a live round into it. Even .44 blanks seem dicey.
Also, with the cylinder shrouds in place, there's too much pressure contained between the gun and shell, imho. All revolvers discharge gas between the cylinder and barrel when fired-- it doesn't just come out the front. I'm going to add a few venting ports in the shell.
The only failure from the test fire was the right side forward facing shroud knob coming off. I'll reinstall it more securely... 
BTW some of you guys do AWESOME modeling work. I want to keep my gun looking battle worn, but I see I still have a fair amount of detail work remaining to meet spec!
http://www.flickr.com/photos/85452191@N00/3056641009/
http://www.flickr.com/photos/85452191@N00/3020793108/
http://www.flickr.com/photos/85452191@N00/3008552259/
http://www.youtube.com/watch?v=sSn5Zg7HtEU
Last edited by doc3d on Sat Nov 29, 2008 11:03 am; edited 5 times in total |
|
| Back to top |
|
|
|
|
|
|
|
|
|
|
|
| Author |
Message |
Mr_Creepy
Community Member

Joined: 24 Nov 2006
Posts: 201
Location: Kansas
|
| Posted: Sat Nov 29, 2008 12:08 am Post subject: |
|
|
WOW 
_________________
- Brian (formerly ToothTech)
 |
|
| Back to top |
|
|
|
|
|
|
|
|
|
|
|
| Author |
Message |
steevy
Community Member
Joined: 25 Jul 2007
Posts: 389
|
| Posted: Sat Nov 29, 2008 12:22 pm Post subject: |
|
|
| Way cool Doc.I love the sandman gun too,love too see that up and firig so keep us posted. |
|
| Back to top |
|
|
|
|
|
|
|
|
|
|
|
| Author |
Message |
doc3d
Community Member
Joined: 28 Nov 2008
Posts: 134
Location: Washington
|
| Posted: Sat Nov 29, 2008 1:46 pm Post subject: PKD leather holster pattern? |
|
|
I'm glad a few people are amused by my operational budget blaster. I'd have had one a long time ago, but I was waiting for Charter Arms to put the 4" Bulldog barrel back into production and offer it as an individual part. (Which they just did a few months ago.)
What I'm now looking for is a good pattern for leather forming a hip holster similar to the one in the movie. I already know how to wet form leather to shape it around a gun, and a guy at a local shoestore will do the side stitching for ten bucks.
Thanks in advance.
Doc |
|
| Back to top |
|
|
|
|
|
|
|
|
|
|
|
| Author |
Message |
doc3d
Community Member
Joined: 28 Nov 2008
Posts: 134
Location: Washington
|
| Posted: Sat Nov 29, 2008 7:17 pm Post subject: PKD mystery screw. Philosophical musing. Safety. |
|
|
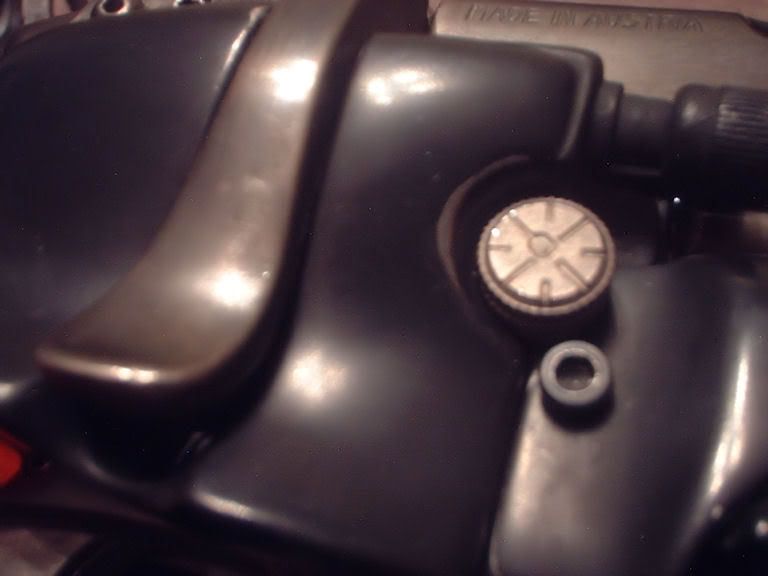
Think I figured it out, and it also accounts for the variation in out-facing knobs on the right-hand Steyr shell that covers the Bulldog cylinder (slotted screw vs. Weaver). That knob was screw type in the movies, and the recently surfaced pistol has a Weaver head, right? If this is the case, my respect for the gunsmith who built the gun just jumped a bunch. He uses that knob to secure the cylinder in place-- e.g. it does what the spring-loaded sleeve around the ejector rod does on a production gun, except it threads into the cylinder swing arm to absolutely lock it down in one position... which we will assume exactly aligns the cylinder's chambers to the barrel.
So, realizing that a hand turned screw wouldn't be reliable, and that he'd want that screw torqued to a specific load that equaled exact alignment, he made a slotted screw. This removes-- or at least reduces-- the human unreliability factor. Of course, the actor would never be allowed to actually load anything into the functional prop. This would be done by the prop master. The scripted scene of the gun being reloaded was likely cut because it would be laughable to see someone putting bullets into a Bulldog revolver on screen. I mean, this is a 2019 weapon that probably fires smart bullets, not a Saturday Night Special!
Now, when the movie prop gun was handed off to the guy it ended up with, it went with the sexy Weaver screw that was likely part of the original design. Which means that either version is technically correct. Assuming someone didn't just lose the slotted screw and replace it with the Weaver sometime after production wrapped.
To make the above work, the cylinder swing arm would have to be re-machined with a curved lug that exactly fit a re-machined locking cutout in the barrel. (You'd have to remachine it in order to get rid of the shoulders in the original Bulldog design, and allow the cylinder to swing shut securely. Afterwards, of course, you torque the screw down on the opposite side.)
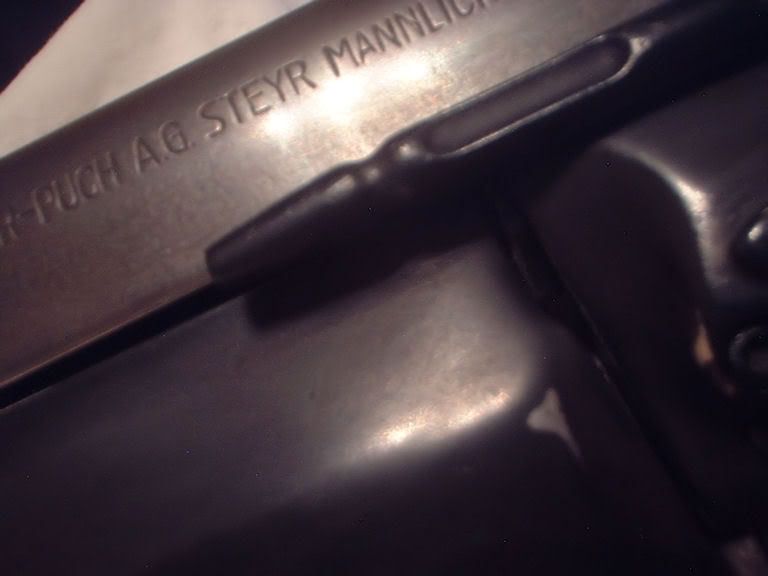
Now, this cannot be done with any known aftermarket PKD prop shell. None of them have good enough metal (way too soft or brittle). Probably an actual Steyr piece would work, with appropriate machining to clear the cylinder. Or machine a good steel replica. Or use my cheapo philosophy and leave the Bulldog safety features alone and don't mess with 'em.
Since I don't have a real Steyr to check this all against, I cannot be sure if it would work or not, so just consider this post philosophical musing, not instructional.
This may be old news to everyone anyway.
Cheers, Doc |
|
| Back to top |
|
|
|
|
|
|
|
|
|
|
|
| Author |
Message |
andy
Community Guide
Joined: 01 Nov 2006
Posts: 6237
Location: Rochester, NY
|
| Posted: Sun Nov 30, 2008 8:38 pm Post subject: |
|
|
Thank you for the Insight Doc and welcome at Propsummit. Glad you made the jump over from BladeZone.
For the Holster, it looks like Phil Steinsneider, has a few more up for sale on his website, and I do highly recomend them as close to screen accurate...
http://props.steinschneider.com/brblaster/csholster.htm
I personally have been trying to modify a Safariland 1001 holster but have had some setback with my leather guys. I may have to do most of the work myself, and without leather working experiences it is taking a long time to figure out just the right way to do it. The Safariland 4" 1001 will fit most replicas of the gun, but it is a bit too tapered and you would still have to convert it belt belt holster from shoulder version. The belt version of that holster looks nothing like the one in the movie.
Good luck, and enjoy the stay.
Andy |
|
| Back to top |
|
|
|
|
|
|
|
|
|
|
|
| Author |
Message |
doc3d
Community Member
Joined: 28 Nov 2008
Posts: 134
Location: Washington
|
| Posted: Sun Nov 30, 2008 10:56 pm Post subject: Crap! |
|
|
Jeez Andy, you just cost me a hundred and thirty bucks! And I'm supposed to be spending my money on my kids and all 'cause 'tis the season...
Seriously, I couldn't afford to make one as nice as the Steinsneider for that money, and I'm a real do-it-yourself type.
But hey, my gun shoots, I have a CC permit, so I guess I have to have a holster. (How's that for rationalizing?)
Fortunately, I found a small unused laser sight in the junk drawer, so that gun upgrade won't be bucks out of pocket.
Thanks a heap. 
doc
BTW, it's not exactly a jump from BladeZone, more like a bridge. I really like the BladeZone folks-- they're cool. |
|
| Back to top |
|
|
|
|
|
|
|
|
|
|
|
| Author |
Message |
andy
Community Guide
Joined: 01 Nov 2006
Posts: 6237
Location: Rochester, NY
|
| Posted: Sun Nov 30, 2008 11:20 pm Post subject: |
|
|
Bladezone is my second home after here, and was my first before this place came around. I do miss the days when all the people on the DVD anniversary set extras were regular posters over there, but there are some great new guys carrying the torch on.
Andy |
|
| Back to top |
|
|
|
|
|
|
|
|
|
|
|
| Author |
Message |
doc3d
Community Member
Joined: 28 Nov 2008
Posts: 134
Location: Washington
|
| Posted: Mon Dec 01, 2008 12:33 am Post subject: |
|
|
(As you read this, imagine you're hearing the voice of Walter Brennan.)
Yep, sonny, I also used to be active in a forum several years back. I'm thinking it was BladeZone. In my geezerhood, I'm finding a little CRS kicking in...
Over twenty years ago I went through a craze of resin blaster building, ranging from stunt guns to completely wacko early Japanese resin.
Nobody had any idea (or, they weren't saying) there was a Bulldog inside.
Anyway, considering all the years since the film, the fact that there are several very active fan groups is kind of amazing. People who think like I do are still around, with new one still stepping up, which reflects well on me.
The film pushed buttons, for sure. And in a way, discovering this futuristic gun was actually powered by a Saturday Night Special is kind satisfying, in a strange sort of way.
doc |
|
| Back to top |
|
|
|
|
|
|
|
|
|
|
|
| Author |
Message |
steevy
Community Member
Joined: 25 Jul 2007
Posts: 389
|
| Posted: Mon Dec 01, 2008 9:05 am Post subject: |
|
|
| The retaining clip in that holster would kill a pewter prop replica.I have a nylon/cordura holster that I modified slightly.Only cost me $20 and it fits my Offworld(my hero stunt gun )perfectly and fits my Coyle okay too.I like the leather better but like I said that retaining clip scares me. |
|
| Back to top |
|
|
|
|
|
|
|
|
|
|
|
|
You cannot post new topics in this forum
You cannot reply to topics in this forum
You cannot edit your posts in this forum
You cannot delete your posts in this forum
You cannot vote in polls in this forum
|
|
|
|
|
|
|
|