 |
 |
|
 |
|
| Author |
Message |
OUTLAW
Community Member
Joined: 05 Mar 2011
Posts: 31
|
 Posted: Sun May 08, 2011 9:17 am Post subject: Toy blaster pics. Posted: Sun May 08, 2011 9:17 am Post subject: Toy blaster pics. |
 |
|
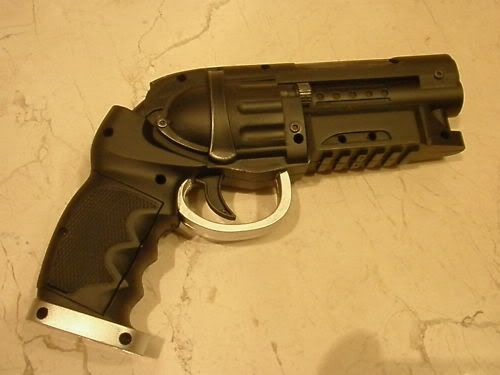
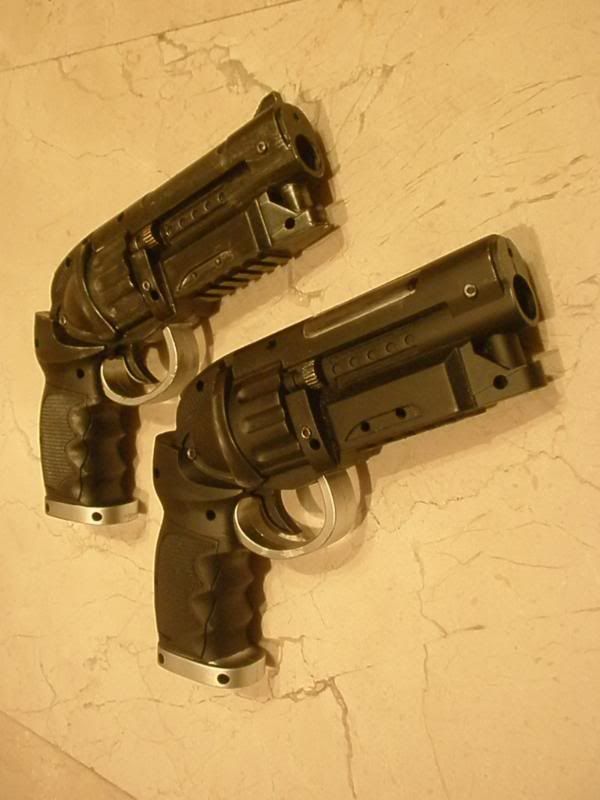
A bunch of plastic toy blasters altered by me and below the first one I did for my son over a year ago.
I bought the standard silver and orange toy which is made in China, removed a few of the plastic bits and gave it a couple of coats of black spray paint then some heavy silver weathering. He loves it and it has stood up very well to some heavy abuse.
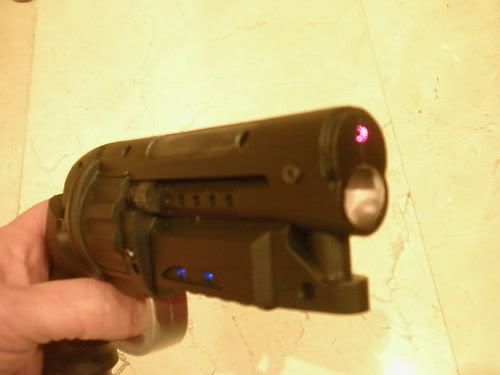
The standard toy comes with a built in laser pointer, lights and sound effects which are pretty good. They also have an orange end to the barrel which moves in and out when you pull the trigger. This is powered by a small motor inside which also powers a fan in the cylinder so the blaster vibrates slightly. These parts are removed on the ones shown below.
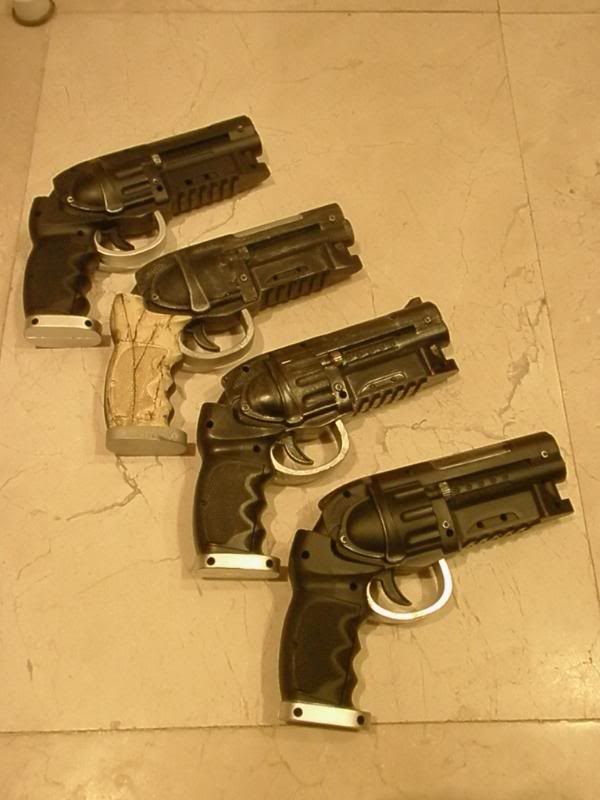
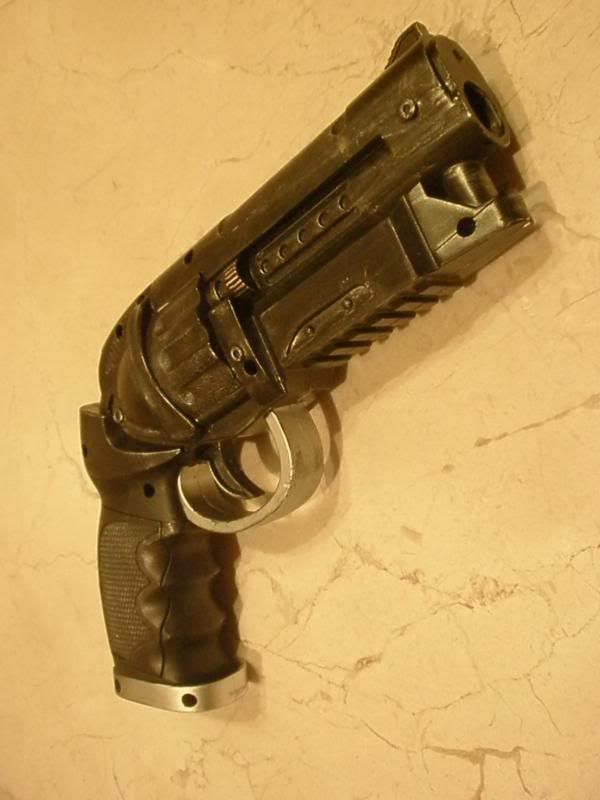
This is the second blaster I bought. I spent a bit more time on this one, filling all the screw holes, repositioning of the lights inside, bone style handle, matt black paint and again heavy weathering. I then clear coated it to protect the finish. I wanted this one to look old and battered.
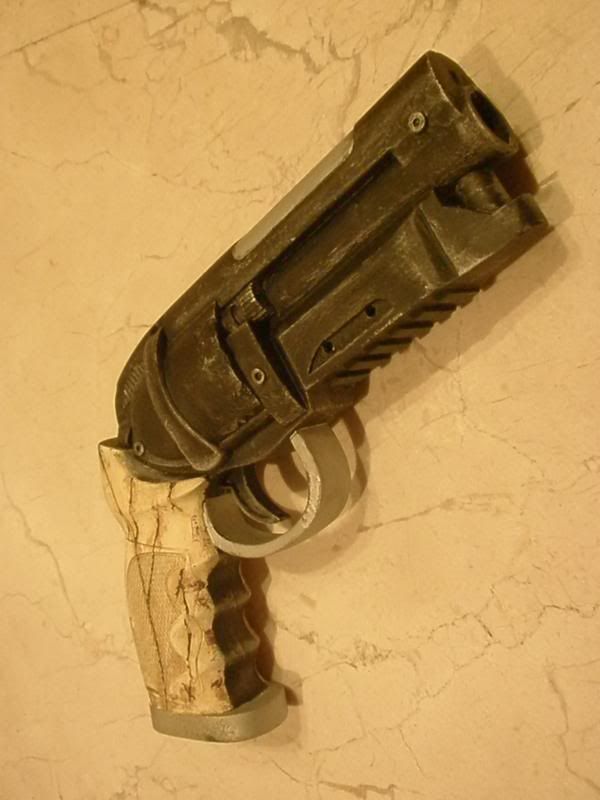
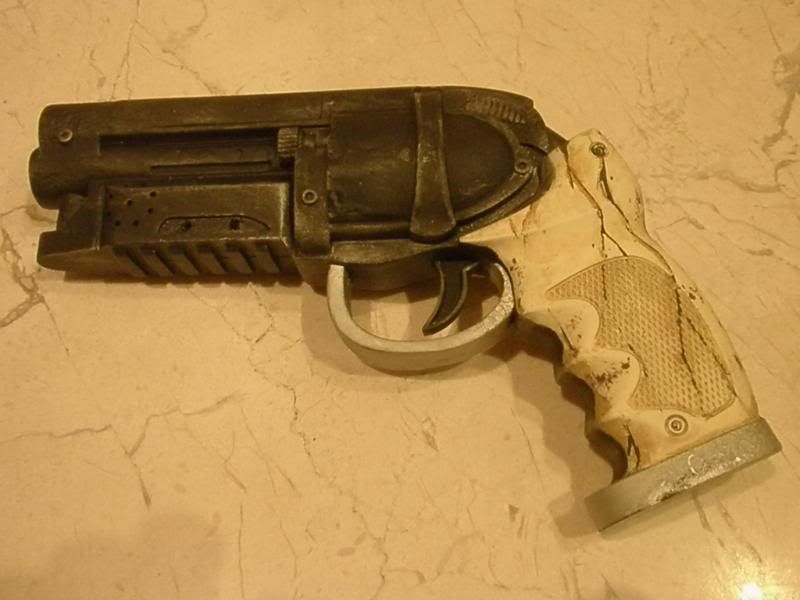
I bought a load of these from a supplier in the UK while he still had some left.
The others again have the lights repositioned, bits removed, painted with 3 coats of matt black but this time with very little weathering.
These have been the most popular amongst friends, far from accurate but quiet a mean looking blaster.
I´ve sold a few of these on eBay too, one went to Canada, another here in Spain and one to Italy.
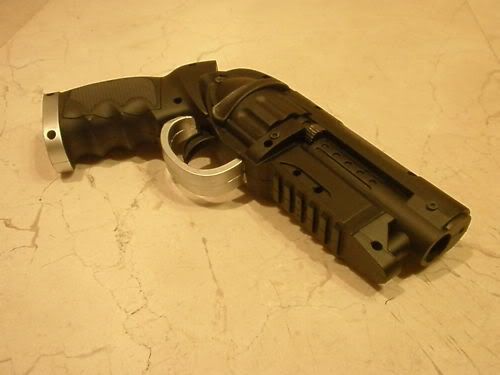
Next I´m going to try one painted silver/alloy and have a play around with the snub versions.
If you can get your hands on some of these they are a very good quailty toy which is pretty much 1/1 scale. They are not expensive so are a great base to try a few ideas on or to even practice on before you attack your "real" replicas and are a lot of fun to boot. |
|
| Back to top |
|
|
|
|
 |
|
 |
|
|
|
|
| Author |
Message |
joberg
Community Member
.jpg)
Joined: 06 Oct 2008
Posts: 9466
|
| Posted: Mon May 09, 2011 7:08 am Post subject: |
|
|
Excellent transfos! Fits right in that BR world for sure  |
|
| Back to top |
|
|
|
|
|
|
|
|
|
|
|
| Author |
Message |
amfx74
Community Member
Joined: 24 Apr 2011
Posts: 138
Location: Australia
|
| Posted: Mon May 09, 2011 7:45 am Post subject: Black and Gold Toy Blaster Conversion |
|
|
I found this toy blaster at a variety store, it is made in china and despite first appearances looks like it will come up quite nicely. It has LED lights a sound box and a motor to spin the lights. It is held together by 10 screws with no glue anywhere which is great.
I have started by removing the gold with some acetone, checked that it would not damage the surface on the inside first. It is acetone resistant.
The spheres just clipped out as did the red light covers.


Next is to remove the extra pieces that should not be there. |
|
| Back to top |
|
|
|
|
|
|
|
|
|
|
|
| Author |
Message |
joberg
Community Member
Joined: 06 Oct 2008
Posts: 9466
|
| Posted: Mon May 09, 2011 1:21 pm Post subject: |
|
|
| Good stuff...keep up the good work. |
|
| Back to top |
|
|
|
|
|
|
|
|
|
|
|
| Author |
Message |
nexus42
Community Member
Joined: 17 Jul 2009
Posts: 90
Location: UK
|
| Posted: Mon May 09, 2011 2:07 pm Post subject: |
|
|
| These are great guns! looking forward to seeing this blaster toy conversion! |
|
| Back to top |
|
|
|
|
|
|
|
|
|
|
|
| Author |
Message |
amfx74
Community Member
Joined: 24 Apr 2011
Posts: 138
Location: Australia
|
| Posted: Tue May 17, 2011 8:13 am Post subject: Toy Blaster update |
|
|
Small update on my toy blaster conversion. Haven't had much time but have removed the struts at the back and the front sight. Removed the pink spinning centre. Rubbed it all back and drilled holes for the LEDs.
 |
|
| Back to top |
|
|
|
|
|
|
|
|
|
|
|
| Author |
Message |
joberg
Community Member
Joined: 06 Oct 2008
Posts: 9466
|
| Posted: Tue May 17, 2011 10:40 am Post subject: |
|
|
| Good stuff...I kinda like that circle in the middle |
|
| Back to top |
|
|
|
|
|
|
|
|
|
|
|
| Author |
Message |
amfx74
Community Member
Joined: 24 Apr 2011
Posts: 138
Location: Australia
|
| Posted: Sat May 21, 2011 9:23 pm Post subject: Toy Blaster Conversion |
|
|
I can't decide what I want to do with the centre. My choices are.
1. Leave it hollow but fill in the edges so you can't see into the rest of the prop.
2. Photo 1: Chamber from another toy gun inserted in the correct position.
3. Photo 2: Chamber dead centre for a pleasing aesthetic.
May also think about creating some sort of housing.
Sorry for the slightly weird angle of the shots as the two are balanced on top of each other.


What do you think? |
|
| Back to top |
|
|
|
|
|
|
|
|
|
|
|
| Author |
Message |
joberg
Community Member
Joined: 06 Oct 2008
Posts: 9466
|
| Posted: Sun May 22, 2011 6:50 pm Post subject: |
|
|
I prefer the first pic: half the barrel showing and half of the rest.  |
|
| Back to top |
|
|
|
|
|
|
|
|
|
|
|
| Author |
Message |
Noeland
Community Guide
Joined: 24 Oct 2006
Posts: 1328
|
| Posted: Mon May 23, 2011 11:31 am Post subject: |
|
|
I think I would fill the void with putty, and continued the details into the putty so the gun looks like a big round hole was never there. 
_________________
I don't have enough blasters! |
|
| Back to top |
|
|
|
|
|
|
|
|
|
|
|
| Author |
Message |
amfx74
Community Member
Joined: 24 Apr 2011
Posts: 138
Location: Australia
|
| Posted: Fri May 27, 2011 7:43 am Post subject: Toy Conversion |
|
|
Hi all,
I am moving house, so will have to put a hold on the conversion for a few weeks. May get a bit done before. |
|
| Back to top |
|
|
|
|
|
|
|
|
|
|
|
|
You cannot post new topics in this forum
You cannot reply to topics in this forum
You cannot edit your posts in this forum
You cannot delete your posts in this forum
You cannot vote in polls in this forum
|
|
|
|
|
|
|
|


