 |
 |
|
 |
|
| Author |
Message |
8th_Passenger
Community Member

Joined: 28 Nov 2009
Posts: 443
Location: Hertfordshire, UK
|
 Posted: Sat Mar 12, 2016 10:31 am Post subject: Posted: Sat Mar 12, 2016 10:31 am Post subject: |
 |
|
Thanks for the suggestions for possible locations. Hopefully a suitable location will crop up when I'm ready.
Just a small update this week.
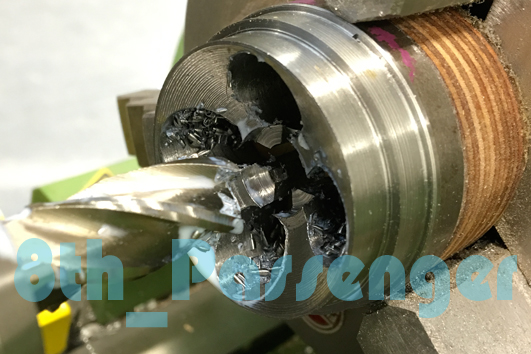
I managed to get the emitter end on the milling machine this week.
I bolted it to a rotary table and lined it up. Always stressful!
The machining went well.
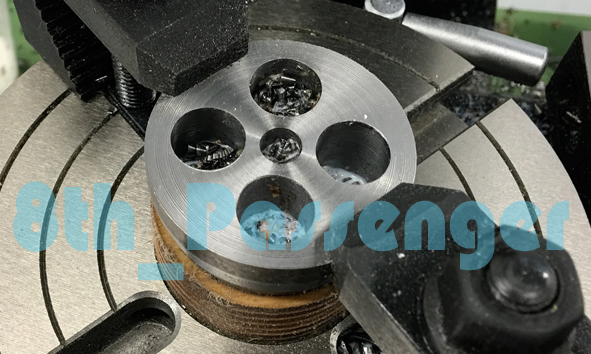
I added the cross slots.
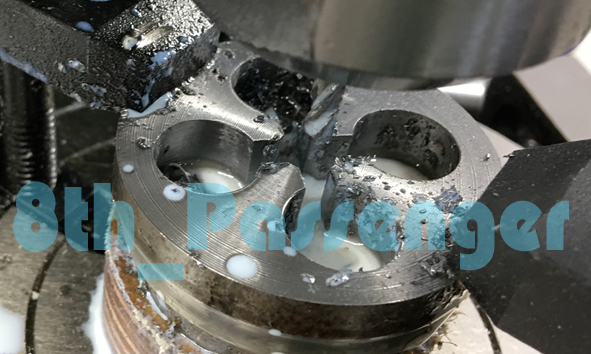
Due to rushing I missed the bottom off one of the slots.
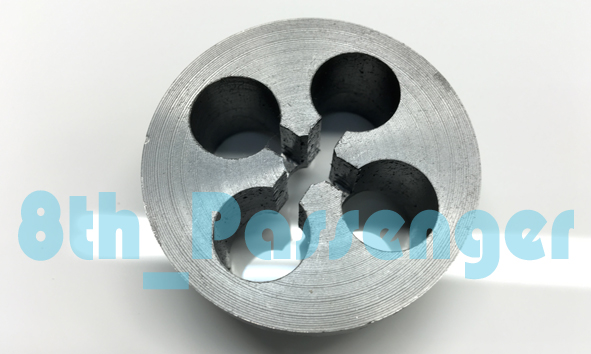
Seen more clearly here on the underside.
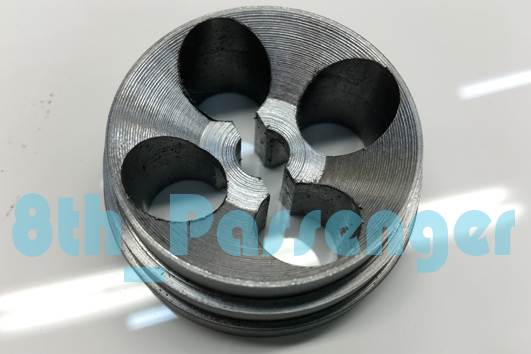
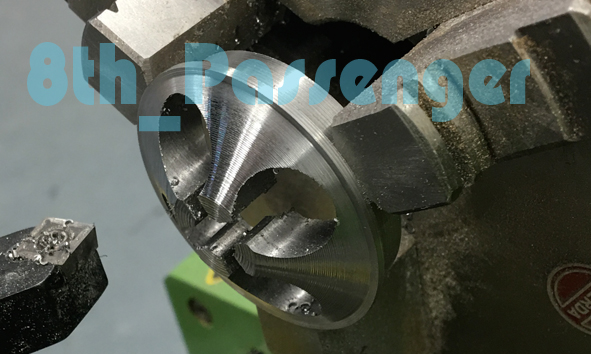
So I used a milling bit in the lathe to add a recess.
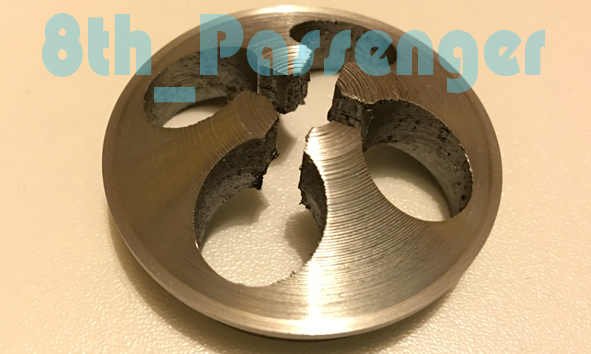
This cleaned it up!
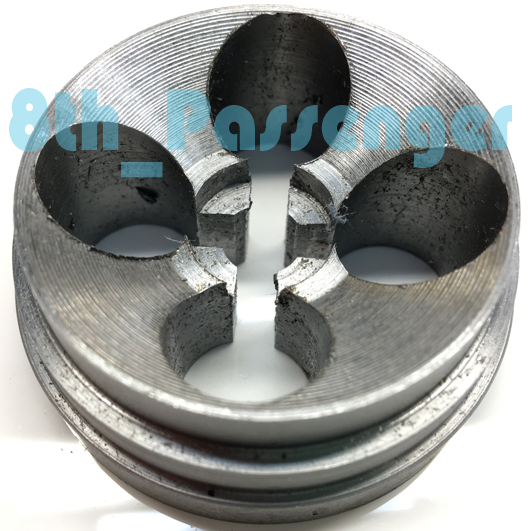
Strangely what I have made looks like a large tapping die!
Next week I hope to shape the front.
More soon.
Colin
_________________
Ripley: What's it key on?
Ash: Micro changes in air density. |
|
| Back to top |
|
|
|
|
 |
|
 |
|
|
|
|
| Author |
Message |
joberg
Community Member
.jpg)
Joined: 06 Oct 2008
Posts: 9447
|
| Posted: Tue Mar 15, 2016 4:29 pm Post subject: |
|
|
Glad that the project is still on the burner. I'm sure you're eager to see it finished and working Colin  |
|
| Back to top |
|
|
|
|
|
|
|
|
|
|
|
| Author |
Message |
8th_Passenger
Community Member
Joined: 28 Nov 2009
Posts: 443
Location: Hertfordshire, UK
|
| Posted: Sat Mar 19, 2016 6:10 pm Post subject: |
|
|
joberg, Yes I would really like to see this project finished.
I think I am coming to the end of posting!
Maybe a couple more posts before the unit is finished.
However this may still take a few months.
This week I turned the front face of the emitter.
I'll need to add some fixings to stop the end falling off. But this gives you an idea of how its shaping up.
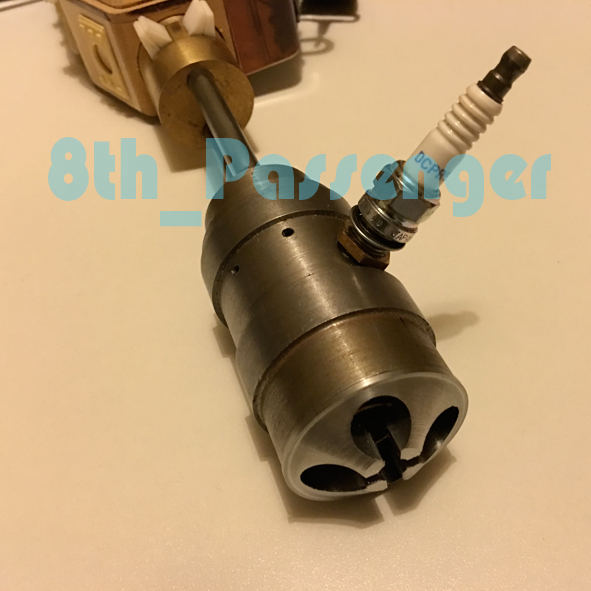
I decided I wasn't happy with my triggers. They weren't really strong enough in Perspex. So here's the start of a new design in aluminum. It will be simpler than the prespex ones (honest).
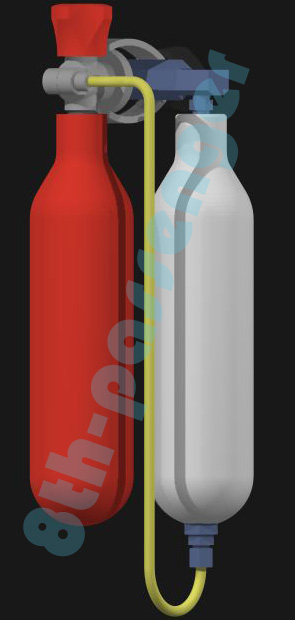
Whilst looking for the 'entry point' (into the main body) of the feed from the bottom of the white tank I noticed various shots of the fully detailed side. So not just used for the table shot after all!

The entry point for the white tank feed seems to to connect with the yoke on the red tank! I'll try and illustrate it on the next post.
So I've got to the point now when I need to start assembling and painting.
The only main outstanding stuff now is the 3 1/4" aluminum tube at the rear and the moulding of the white tank in GRP.
There are still lots of little jobs as I fit all the parts together.
Hopefully the next prgress post will signal the end of the build.
Colin
_________________
Ripley: What's it key on?
Ash: Micro changes in air density. |
|
| Back to top |
|
|
|
|
|
|
|
|
|
|
|
| Author |
Message |
joberg
Community Member
Joined: 06 Oct 2008
Posts: 9447
|
| Posted: Sun Mar 20, 2016 6:23 pm Post subject: |
|
|
Ah! You know, like me, that little details amount to lots of work
But, yes, it'll be good to see that prop working! Keep up the great work Colin...end of tunnel is near. |
|
| Back to top |
|
|
|
|
|
|
|
|
|
|
|
| Author |
Message |
Pro Mod
Community Member
Joined: 13 Aug 2010
Posts: 108
Location: Manchester, England
|
| Posted: Mon Mar 21, 2016 12:52 pm Post subject: |
|
|
| Amazing as always Colin. |
|
| Back to top |
|
|
|
|
|
|
|
|
|
|
|
| Author |
Message |
cratercritter
Community Member
Joined: 15 Jul 2009
Posts: 558
|
| Posted: Mon Mar 21, 2016 1:47 pm Post subject: |
|
|
Thanks for all the cool pics of work in progress. Looks awesome.  |
|
| Back to top |
|
|
|
|
|
|
|
|
|
|
|
| Author |
Message |
8th_Passenger
Community Member
Joined: 28 Nov 2009
Posts: 443
Location: Hertfordshire, UK
|
| Posted: Tue Mar 22, 2016 3:30 pm Post subject: |
|
|
Thanks for your comments Joberg, Pro Mod and cratercritter.
I'm slowly working through all those little jobs.
Colin
_________________
Ripley: What's it key on?
Ash: Micro changes in air density. |
|
| Back to top |
|
|
|
|
|
|
|
|
|
|
|
| Author |
Message |
8th_Passenger
Community Member
Joined: 28 Nov 2009
Posts: 443
Location: Hertfordshire, UK
|
| Posted: Sun Apr 03, 2016 4:50 pm Post subject: |
|
|
Now the weather has got warmer I have been able to tackle my fiber glass tank.
I dusted off my laser cut former.

And coated it with some packing tape before apply some release wax.
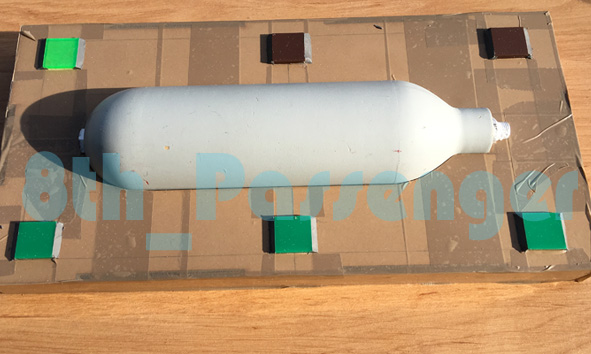
Its been a while since I have done any fiber glassing. But it went okay.
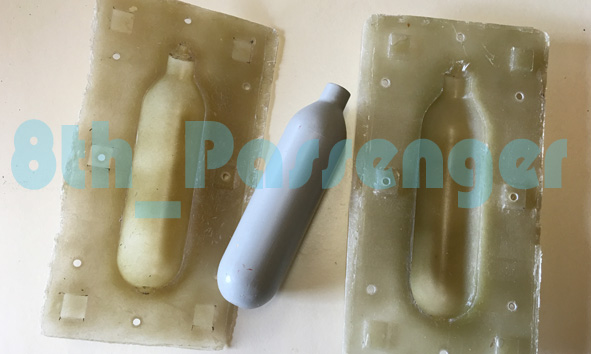
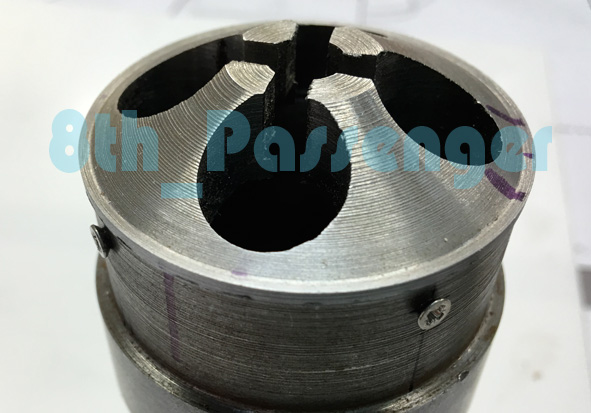
I test fitted the steel core in the mould.
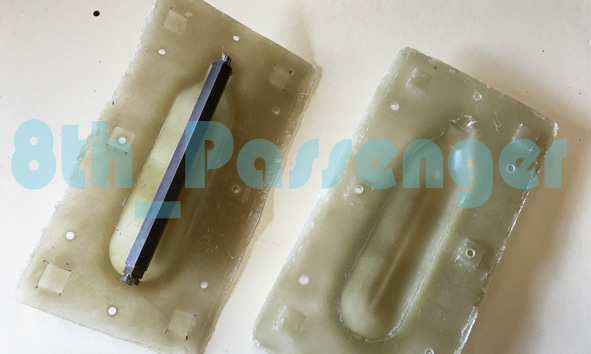
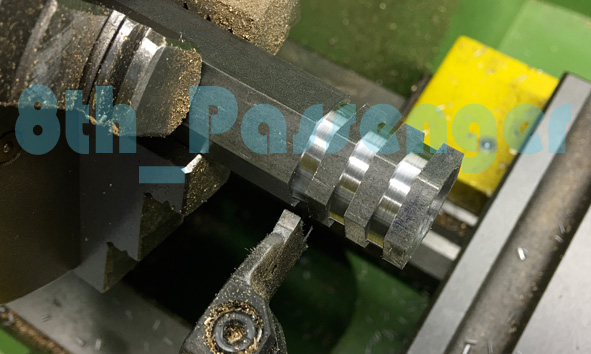
I added some grooves into my steel core to grip to the glass and resin in the positive cast.
It came out okay. I used aluminum powder in the gel coat to help with the painting and weathering.
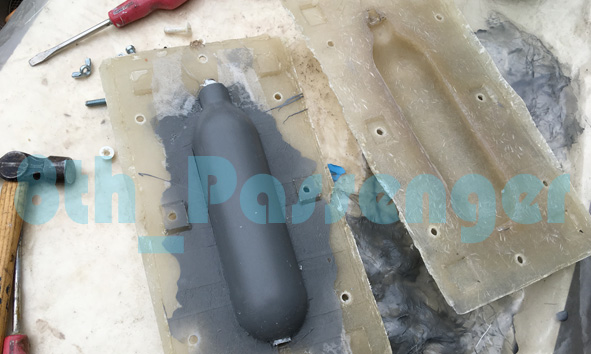
I drilled a hole in the side so I could pour resin in to strengthen the inside. So I need to do a bit more clean up before I can apply the final detail to the exterior.

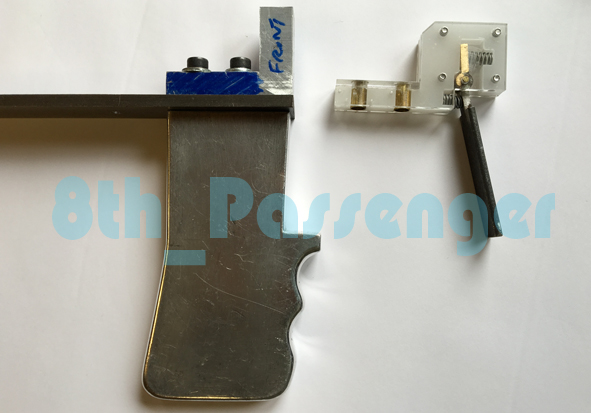
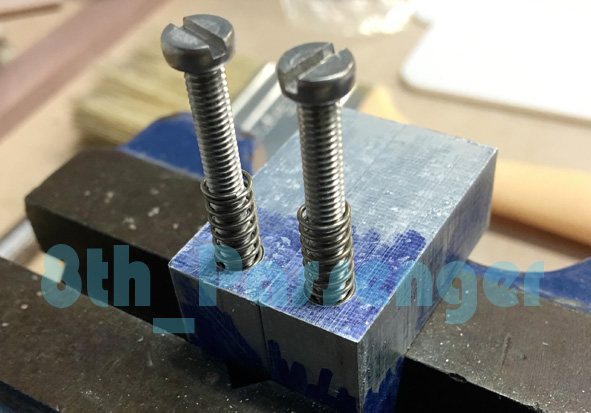
This is my simplified trigger concept. Using one hinge and one spring
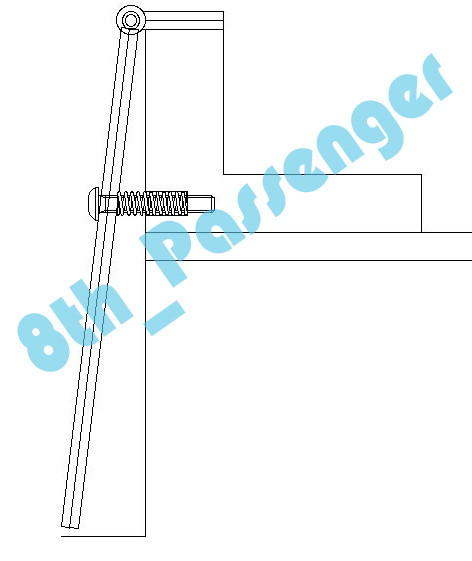
I drilled a stepped hole in each trigger. One hole to tap (for the bolt) and a larger hole to hold the spring.
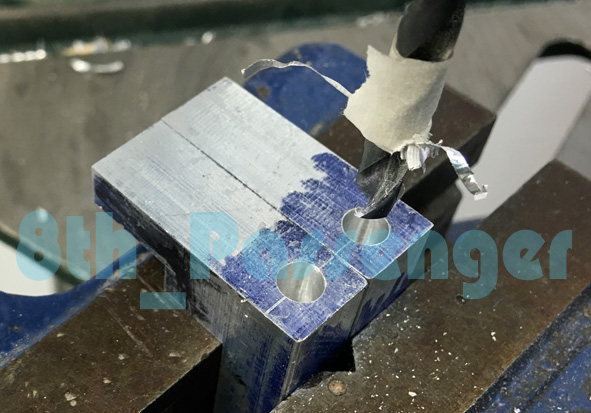
Like so.
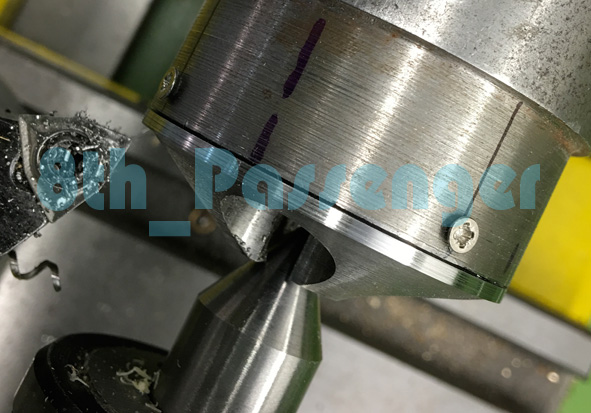
I decided to secure the emitter end on with four M2 counter sunk bolts. They need counter sinking.
With the emitter end held secure I trimmed it flush with the main piece. I will replace the posi drive headed bolts with counter sunk allen head ones.
So here's an illustration of where I think the feed from the bottom of the white tank goes. I could be wrong. Its hard to see. It could just go straight up in to the body, which is where I've always thought it went.
Getting real close now.
Colin
_________________
Ripley: What's it key on?
Ash: Micro changes in air density. |
|
| Back to top |
|
|
|
|
|
|
|
|
|
|
|
| Author |
Message |
SKIN JOB 66
Community Member

Joined: 16 Jan 2008
Posts: 2724
Location: FRANCE
|
| Posted: Wed Apr 13, 2016 1:41 pm Post subject: |
|
|
Amazing work once again Colin, it's really going to be impressive once completed !!!

Fred
_________________
THE FUTURE IS A THING OF THE PAST |
|
| Back to top |
|
|
|
|
|
|
|
|
|
|
|
| Author |
Message |
retrogarde
Community Member
Joined: 29 Dec 2012
Posts: 131
Location: Maine
|
| Posted: Thu Apr 14, 2016 10:43 am Post subject: |
|
|
This is coming together so nicely!
Great work sir. |
|
| Back to top |
|
|
|
|
|
|
|
|
|
|
|
| Author |
Message |
8th_Passenger
Community Member
Joined: 28 Nov 2009
Posts: 443
Location: Hertfordshire, UK
|
| Posted: Thu Apr 14, 2016 1:35 pm Post subject: |
|
|
Thank you retrogarde and Fred for your comments.
Only a few things left to do now before painting.
Colin
_________________
Ripley: What's it key on?
Ash: Micro changes in air density. |
|
| Back to top |
|
|
|
|
|
|
|
|
|
|
|
| Author |
Message |
joberg
Community Member
Joined: 06 Oct 2008
Posts: 9447
|
| Posted: Sat Apr 23, 2016 7:40 am Post subject: |
|
|
| Yep, this is going to be one of the best replica of that iconic prop |
|
| Back to top |
|
|
|
|
|
|
|
|
|
|
|
| Author |
Message |
Isnochys79
Community Member
Joined: 17 Jan 2013
Posts: 121
Location: France
|
| Posted: Tue May 03, 2016 8:42 am Post subject: |
|
|
| WOW !! Highly admirative of the talent and accuracy you put in this prop Colin |
|
| Back to top |
|
|
|
|
|
|
|
|
|
|
|
| Author |
Message |
8th_Passenger
Community Member
Joined: 28 Nov 2009
Posts: 443
Location: Hertfordshire, UK
|
| Posted: Wed May 04, 2016 7:34 am Post subject: |
|
|
Thanks joberg and Isnochys79 for the comments.
I've started painting the flamethrower and have almost tied up all the loose ends.
So depending on how much free time I have I might have it finished by the end of the month.
Colin
_________________
Ripley: What's it key on?
Ash: Micro changes in air density. |
|
| Back to top |
|
|
|
|
|
|
|
|
|
|
|
| Author |
Message |
cratercritter
Community Member
Joined: 15 Jul 2009
Posts: 558
|
| Posted: Thu May 05, 2016 1:35 pm Post subject: |
|
|
Thanks for posting this. Very technically detailed and involved work there.
Looking forward to seeing more and the completed project.
Regards...  |
|
| Back to top |
|
|
|
|
|
|
|
|
|
|
|
| Author |
Message |
Space Jockey
Community Member

Joined: 13 Apr 2009
Posts: 559
Location: East Tennessee
|
| Posted: Sat May 07, 2016 6:54 am Post subject: |
|
|
Friggin' awesome! Love it!  |
|
| Back to top |
|
|
|
|
|
|
|
|
|
|
|
| Author |
Message |
8th_Passenger
Community Member
Joined: 28 Nov 2009
Posts: 443
Location: Hertfordshire, UK
|
| Posted: Sat May 07, 2016 4:32 pm Post subject: |
|
|
cratecritter and Space Jockey thank you for your comments.
This is what I hope will be the 'final' build update.
Anything I've missed I'll put in the last post!
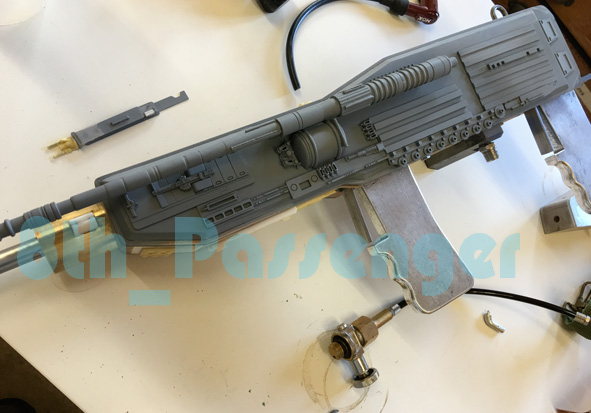
Here's the re-made trigger mechanism. I'm not sure if it's better than my original version but it works and is all metal. Which is what I was after.
.jpg)
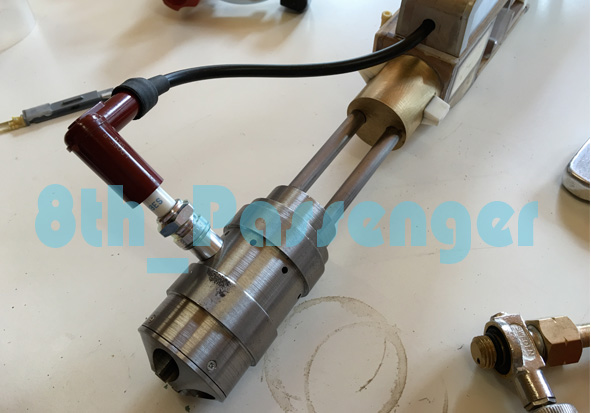
I turned a brass connector for the pipe that goes into the top vent to give it some strength. The top bend I had to recast in white metal as the fast cast one (pictured) broke when I laid it down on that side.
.jpg)
I thought I would see what a modern spark plug cap would look like. The design of these hasn't changed much but I couldn't find one similar to the reference. So this was a bit of an experiment to see what it looked like.
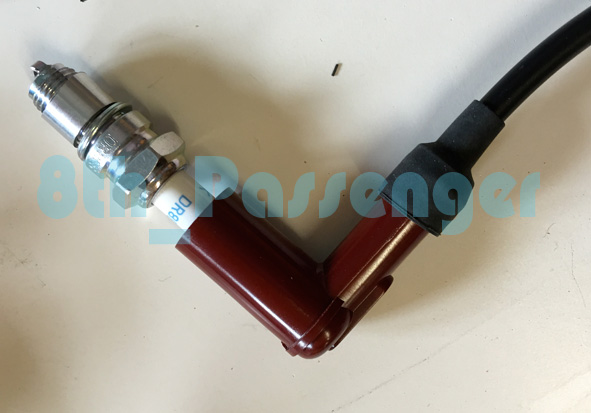
It looked okay but wasn't really cannon!
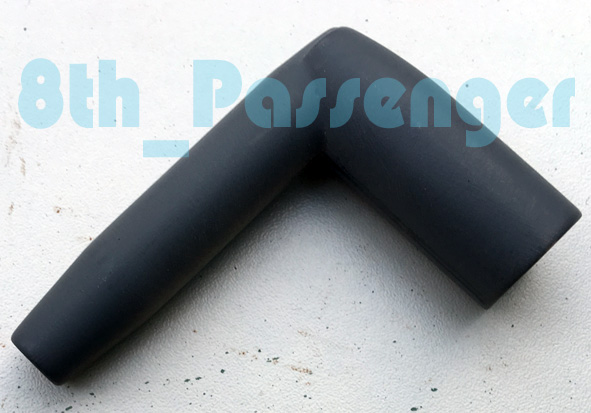
So from the reference I drew up this.
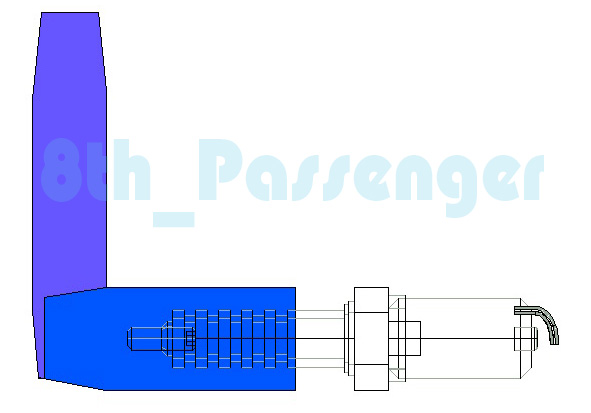
Realized here in two pieces of turned fastcast. I need to do a fiberglass mould and then cast it in a cold cure hard black rubber.
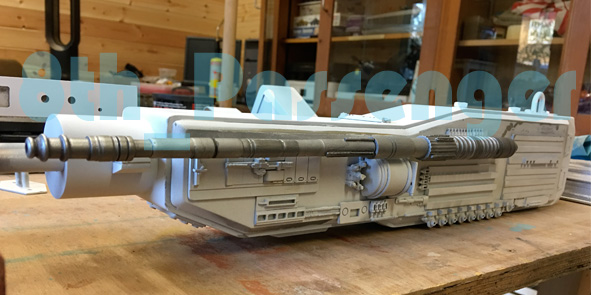
Here's a preview of how the painting is taking shape.
Left side with a coat of primer
I've sprayed the body with grey primer, a mustard colored primer, aluminum and finally white. The idea being I can sand back the paint layers and get different colors showing through. I will then add washes to dirty the white down.
This is the start of the paint job on the top vent.
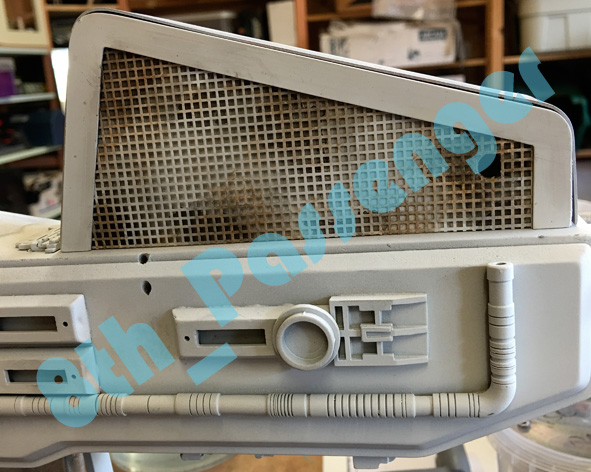
I'm not trying to re create the paint job accurately from any particular photo reference. I'm just trying to recreate the feel of the paint job and put my own spin on it!
I'll just keep layering until I get the look I'm happy with.
Colin
_________________
Ripley: What's it key on?
Ash: Micro changes in air density. |
|
| Back to top |
|
|
|
|
|
|
|
|
|
|
|
| Author |
Message |
Pro Mod
Community Member
Joined: 13 Aug 2010
Posts: 108
Location: Manchester, England
|
| Posted: Sun May 08, 2016 4:28 am Post subject: |
|
|
Colin thanks for sharing this great build with us. Your craftsmanship is only matched by your never ending pursuit for accuracy!
As someone in the industry I'm always interested in methods employed by others and I've learned a lot from your posts.
Looking forward to seeing this finished and hoping you have something just as interesting to follow up with - perhaps something with a bit of complexity to it this time and not this easy stuff!  |
|
| Back to top |
|
|
|
|
|
|
|
|
|
|
|
| Author |
Message |
joberg
Community Member
Joined: 06 Oct 2008
Posts: 9447
|
| Posted: Sun May 08, 2016 3:57 pm Post subject: |
|
|
That paint job is going to be the bomb! I hear you when you want to have different washes. Lot's of "wear and tear" with that prop.
Keep up the wonderful job |
|
| Back to top |
|
|
|
|
|
|
|
|
|
|
|
| Author |
Message |
8th_Passenger
Community Member
Joined: 28 Nov 2009
Posts: 443
Location: Hertfordshire, UK
|
| Posted: Tue May 10, 2016 1:43 am Post subject: |
|
|
Thanks Pro Mod for the comments.
This project has been a challenge and taken far longer than I thought. I've learnt things too.
Just when I think I'm on the home stretch problems with the final assembly keep on cropping up. And then I realise why things have been done a certain way on the original.
But I'm getting there.
I hope I can do the paint job justice Joberg.
I don't think I'll be starting a new project soon. I need a break.
Colin
_________________
Ripley: What's it key on?
Ash: Micro changes in air density. |
|
| Back to top |
|
|
|
|
|
|
|
|
|
|
|
|
You cannot post new topics in this forum
You cannot reply to topics in this forum
You cannot edit your posts in this forum
You cannot delete your posts in this forum
You cannot vote in polls in this forum
|
|
|
|
|
|
|
|


